How I took the stress out of release emails using Obsidian dataviews and macOS shortcuts
How do I automate emails from Obsidian on a Mac?
To automate emails from Obsidian you can use macOS Shortcuts.
- Make sure you fill in the relevant data as YAML front matter in Obsidian.
- Create a button within Obsidian to trigger the macOS Shortcut.
- Create a macOS Shortcut to take the data from Obsidian and create an email in Mail.
This tutorial will cover the triggering of the macOS Shortcut within Obsidian and the following tutorial will cover the creation of the email with Shortcuts.
Flow
How do I automate an email with Obsidian on a Mac?
Step 1: Create a page in Obsidian with all the email details
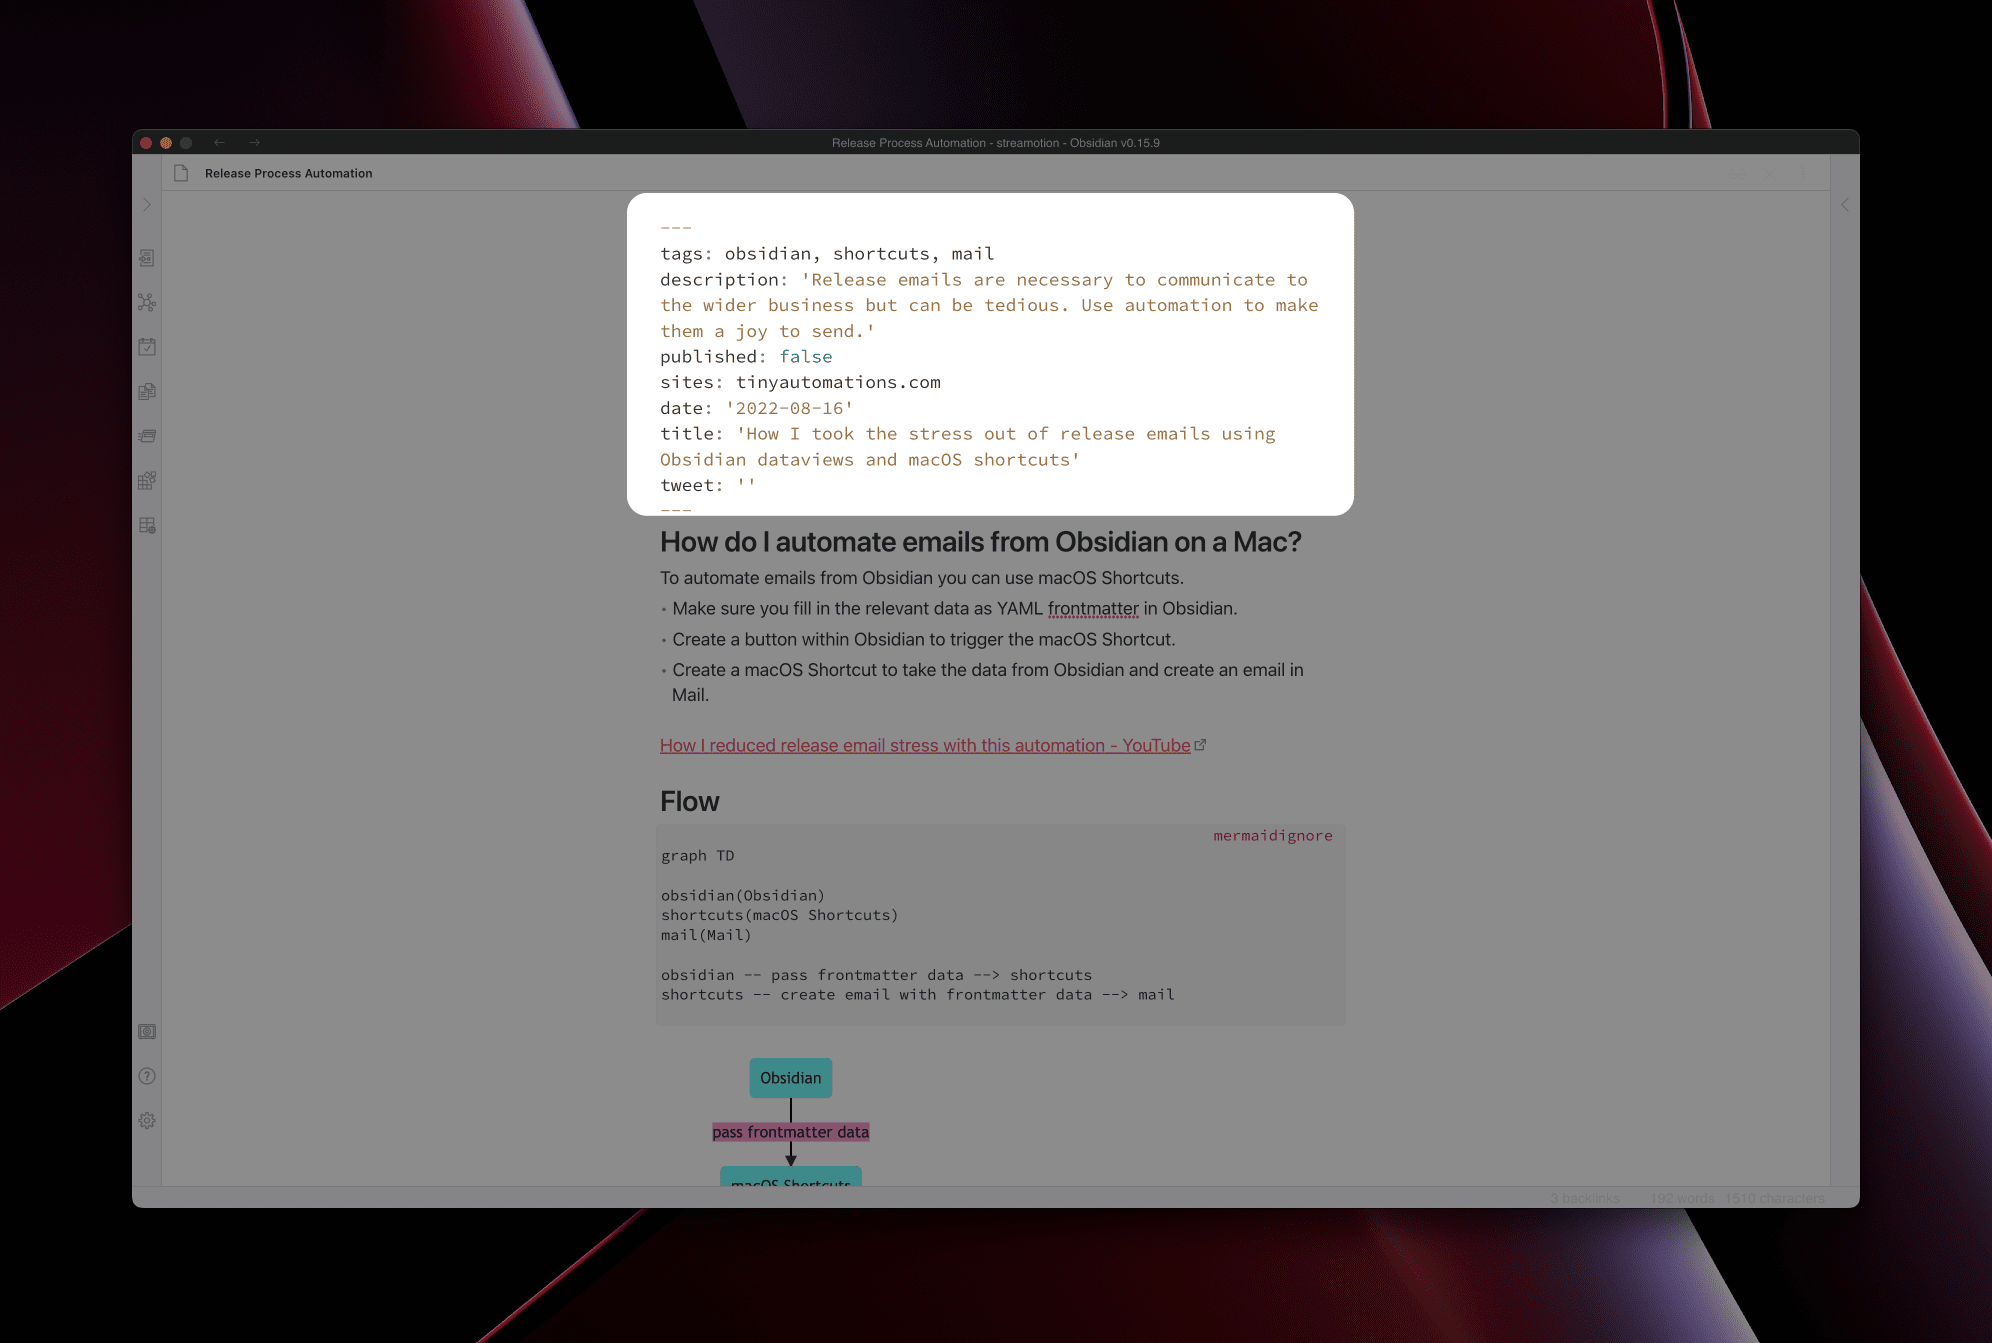
This information should also include anything you want to filter in your Obsidian dataviews and anything you want to include in your emails. The simplest way to do this is within the YAML front matter of the Obsidian markdown document.
What is an Obsidian dataview?
An Obsidian dataview allows you to create tables by querying your Obsidian vault. It works like querying a traditional database but with a dataview you query your markdown files within your vault. We will use Obsidian buttons within each row of this dataview to trigger the macOS shortcut that creates the email.
What is YAML front matter in Obsidian?
YAML front matter is text at the top of your Obsidian markdown document surrounded with three dashes ---. You can store data associated with the file such as tags, title, description and published. The below image shows the type of data we have used for this automation.
Step 2: Create an Obsidian dataview that lists your unpublished blog posts
In a page embed the following code:
1```dataview
2TABLE "BUTTON" AS " "
3FROM "tiny-automations" SORT date DESC
4WHERE published = false AND contains(sites, "tinyautomations.com")
5```
This will create a table that contains all the files within the tiny-automations folder where released is false and sites contains tinyautomations.com. This will list all blog posts that haven't been published yet.
You'll notice we have the text BUTTON that appears in the second column. We are going to replace that text with code for a clickable button to trigger the automation.
Step 3: Create a button within your dataview
In place of the BUTTON text we want a Release email button that we can click to trigger the automation. We do this by swapping out the BUTTON text in the dataview with the code for a button. Here is an example of how to embed a button in Obsidian:
1```button
2name Release email
3type link
4action shortcuts://run-shortcut?name=Create%20draft%20email&input=text&text=INPUT_DATA_HERE
5class button-css
6```
This will create a standalone button that runs a macOS Shortcut named Create draft email (the %20 is a URL encoded version of a space character). We want to embed this button in each dataview row so that when we click it it runs the Create draft email shortcut with data from our markdown documents.
To embed the button in the dataview we need to replace the BUTTON text with the above button code:
1```dataview
2TABLE "```button
3name Release email
4type link
5action shortcuts://run-shortcut?name=Create%20draft%20email&input=text&text=INPUT_DATA_HERE
6class button-css
7```" AS " "
8FROM "tiny-automations" SORT date DESC
9WHERE published = false AND contains(sites, "tinyautomations.com")
10```
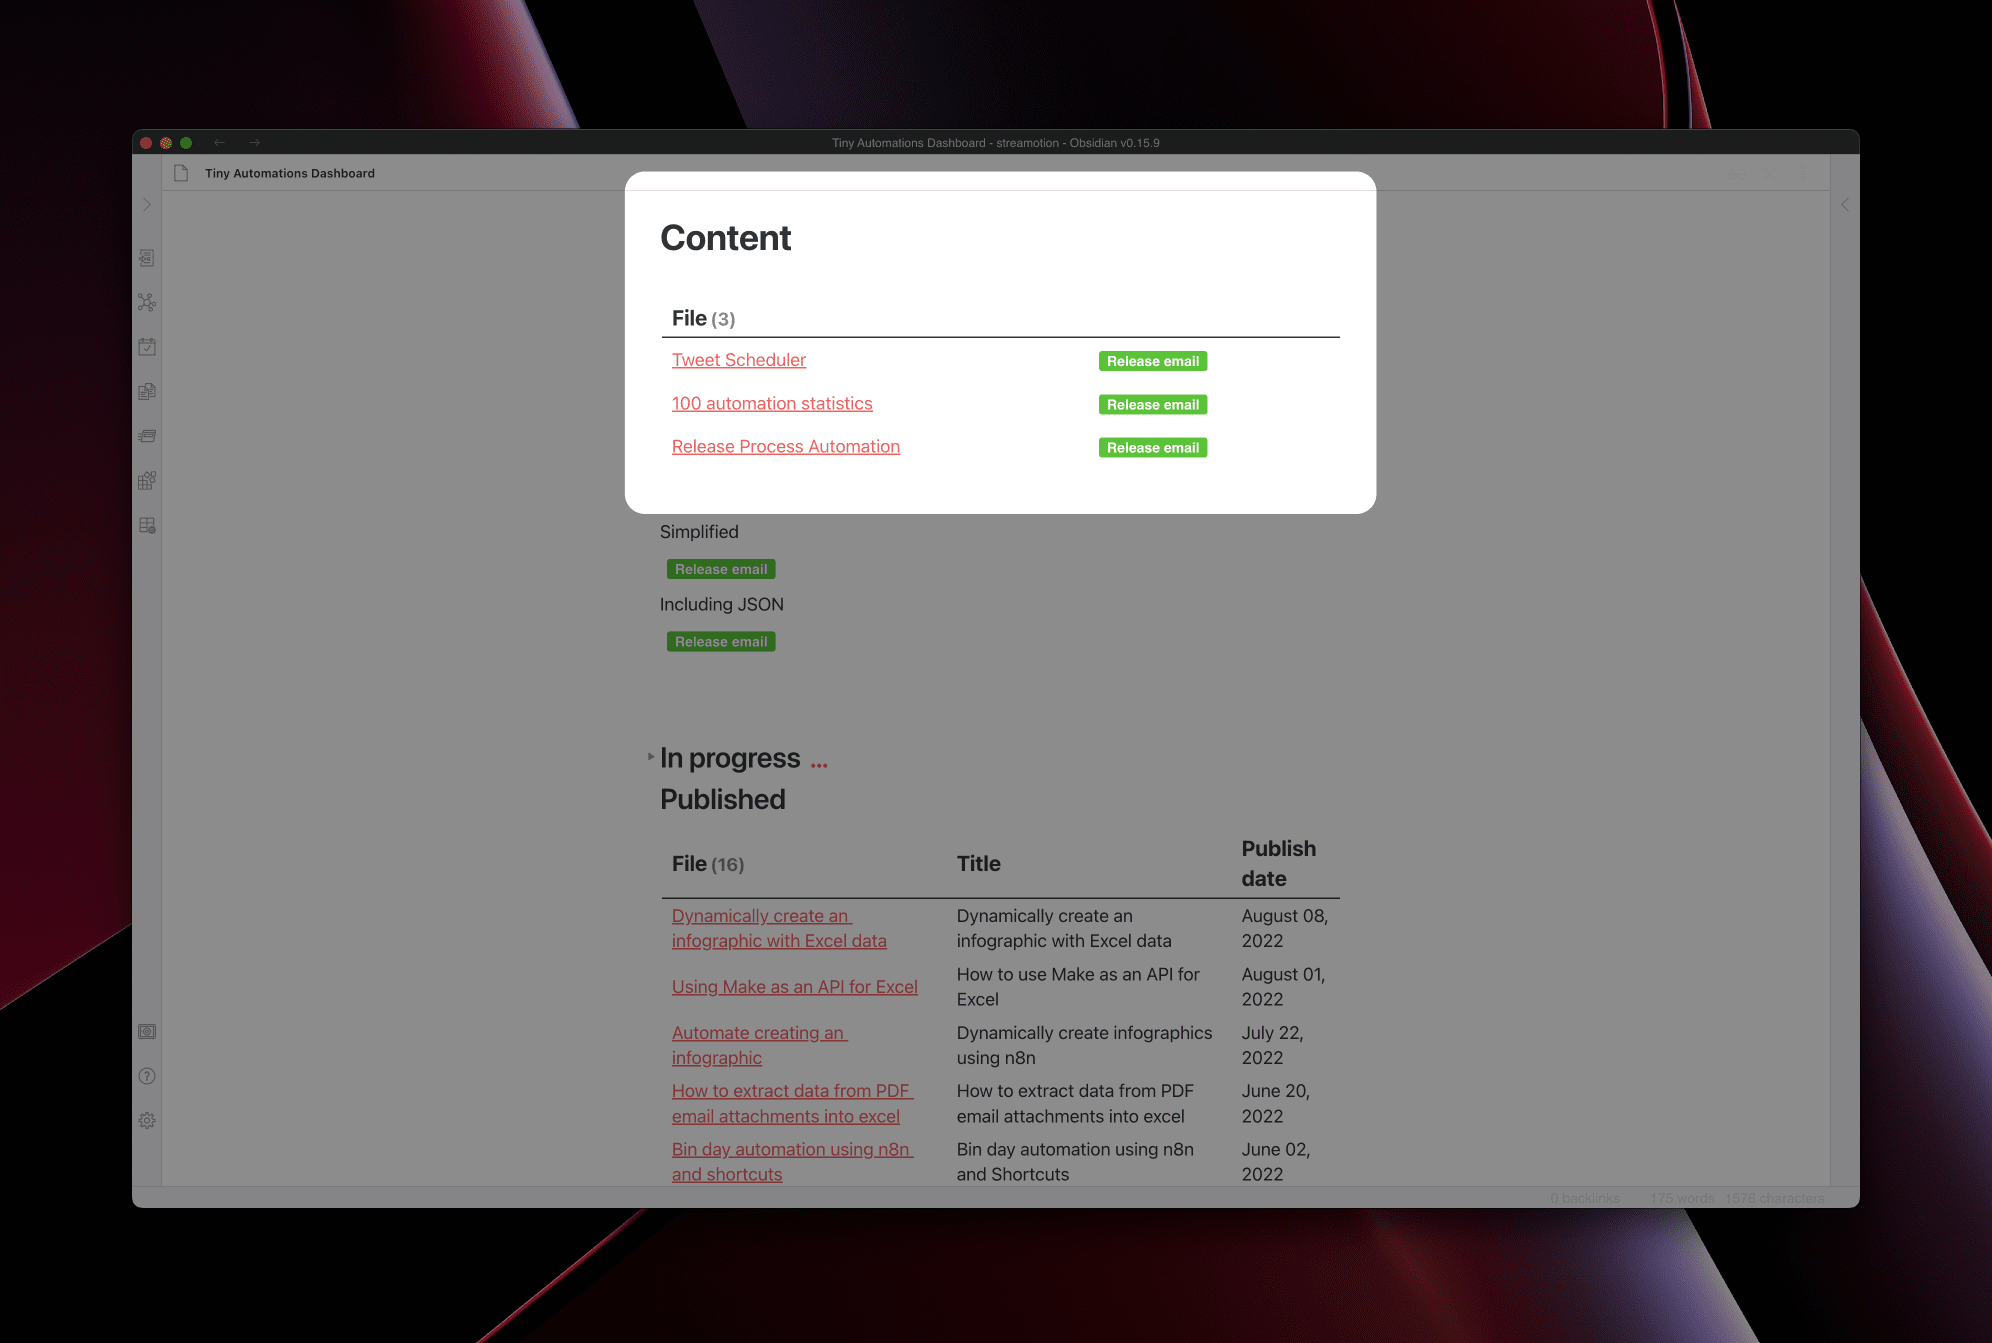
This will create a dataview with a Release email button that looks like this:
Step 4: Pass data into the shortcut
This is the most complicated step. We want to pass data into the macOS shortcut from Obsidian. To do this we replace the INPUT_DATA_HERE text with a JSON object filled with data from your markdown files. JSON is a way of constructing data that follows a format like:
1{
2	"property1": "value1",
3	"property2": "value2"
4}
We want to pass in the title, description and tags of the relevant page to the shortcut (we can then create an email from this data). So the JSON we want to create will look like this:
1{
2	"title": "Title of page goes here",
3	"description": "Description of page goes here"
4	"tags": "Tags from page go here"
5}
As you can see we need to fill in the values with the correct text from the YAML front matter of each page in each of the rows of the dataview. Obsidian dataviews allow us to access the files front matter with the variable file.frontmatter - so if I wanted to reference the title from the front matter I could use file.frontmatter.title. Replacing the text above with correct data from each row we get:
1{
2	"title": file.frontmatter.title,
3	"description": file.frontmatter.description
4	"tags": file.frontmatter.tags
5}
There are two more steps to make this actionable. We need to replace certain strings (text) with their URL encoded counterparts - this is to make it machine readable. We also have to do some escaping of characters for this reason as well - especially with \" as it is an embedded string. This may look a little complex but after a while you get used to it.
If we construct the JSON so it is readable within the Obsidian dataview it will look like this:
1replace(replace(replace(replace(replace(replace(
2	"{\"title\": \"" + file.frontmatter.title +
3	"\", \"description\":\"" + file.frontmatter.description +
4	"\", \"tags\":\"" + file.frontmatter.tags + "\"}", " ", "%20"), "/", "%2F"), "?", "%3F"), "=", "%3D"), ":", "%3A"), "&", "%26")
We then need to add this to the button code:
1```button
2name Release email
3type link
4action shortcuts://run-shortcut?name=TA%20Create%20draft%20email&input=text&text=" + replace(replace(replace(replace(replace(replace(
5	"{\"title\": \"" + file.frontmatter.title +
6	"\", \"description\":\"" + file.frontmatter.description +
7	"\", \"tags\":\"" + file.frontmatter.tags + "\"}", " ", "%20"), "/", "%2F"), "?", "%3F"), "=", "%3D"), ":", "%3A"), "&", "%26") + "
8class button-css
9```
This is is the button complete. We replaced INPUT_DATA_HERE with the JSON we created above. Now if we replace the BUTTON text in the dataview with the above button we get the completed code of:
1```dataview
2TABLE "```button
3name Release email
4type link
5action shortcuts://run-shortcut?name=Create%20draft%20email&input=text&text=" + replace(replace(replace(replace(replace(replace(
6	"{\"title\": \"" + file.frontmatter.title +
7	"\", \"description\":\"" + file.frontmatter.description +
8	"\", \"tags\":\"" + file.frontmatter.tags + "\"}", " ", "%20"), "/", "%2F"), "?", "%3F"), "=", "%3D"), ":", "%3A"), "&", "%26") + "
9class button-css
10```" AS " "
11FROM "tiny-automations" SORT date DESC
12WHERE published = false AND contains(sites, "tinyautomations.com")
13```
This dataview now lists all the not yet published blog posts. When we click the Release email button it will trigger the macOS Shortcut Create draft email (covered in our next tutorial) and we can create our release email.