How to automate draft email creation with Shortcuts
Overview
The last tutorial taught us how to create automated emails using macOS shortcuts. However, you may want to automate creating a draft email to make it easier for you to conduct your regular email marketing campaigns. Once created you will only need to enter your recipients in the automated draft email.
We use Obsidian and the JSON text strings created in the previous tutorial to create a draft email. JSON text strings use Shortcuts to make the draft email automation.
Flow
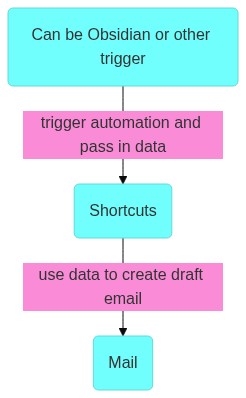
Let's recreate this automation
Resources
Step 1: Create empty shortcut and check JSON
- The first step is to add a blank shortcut.
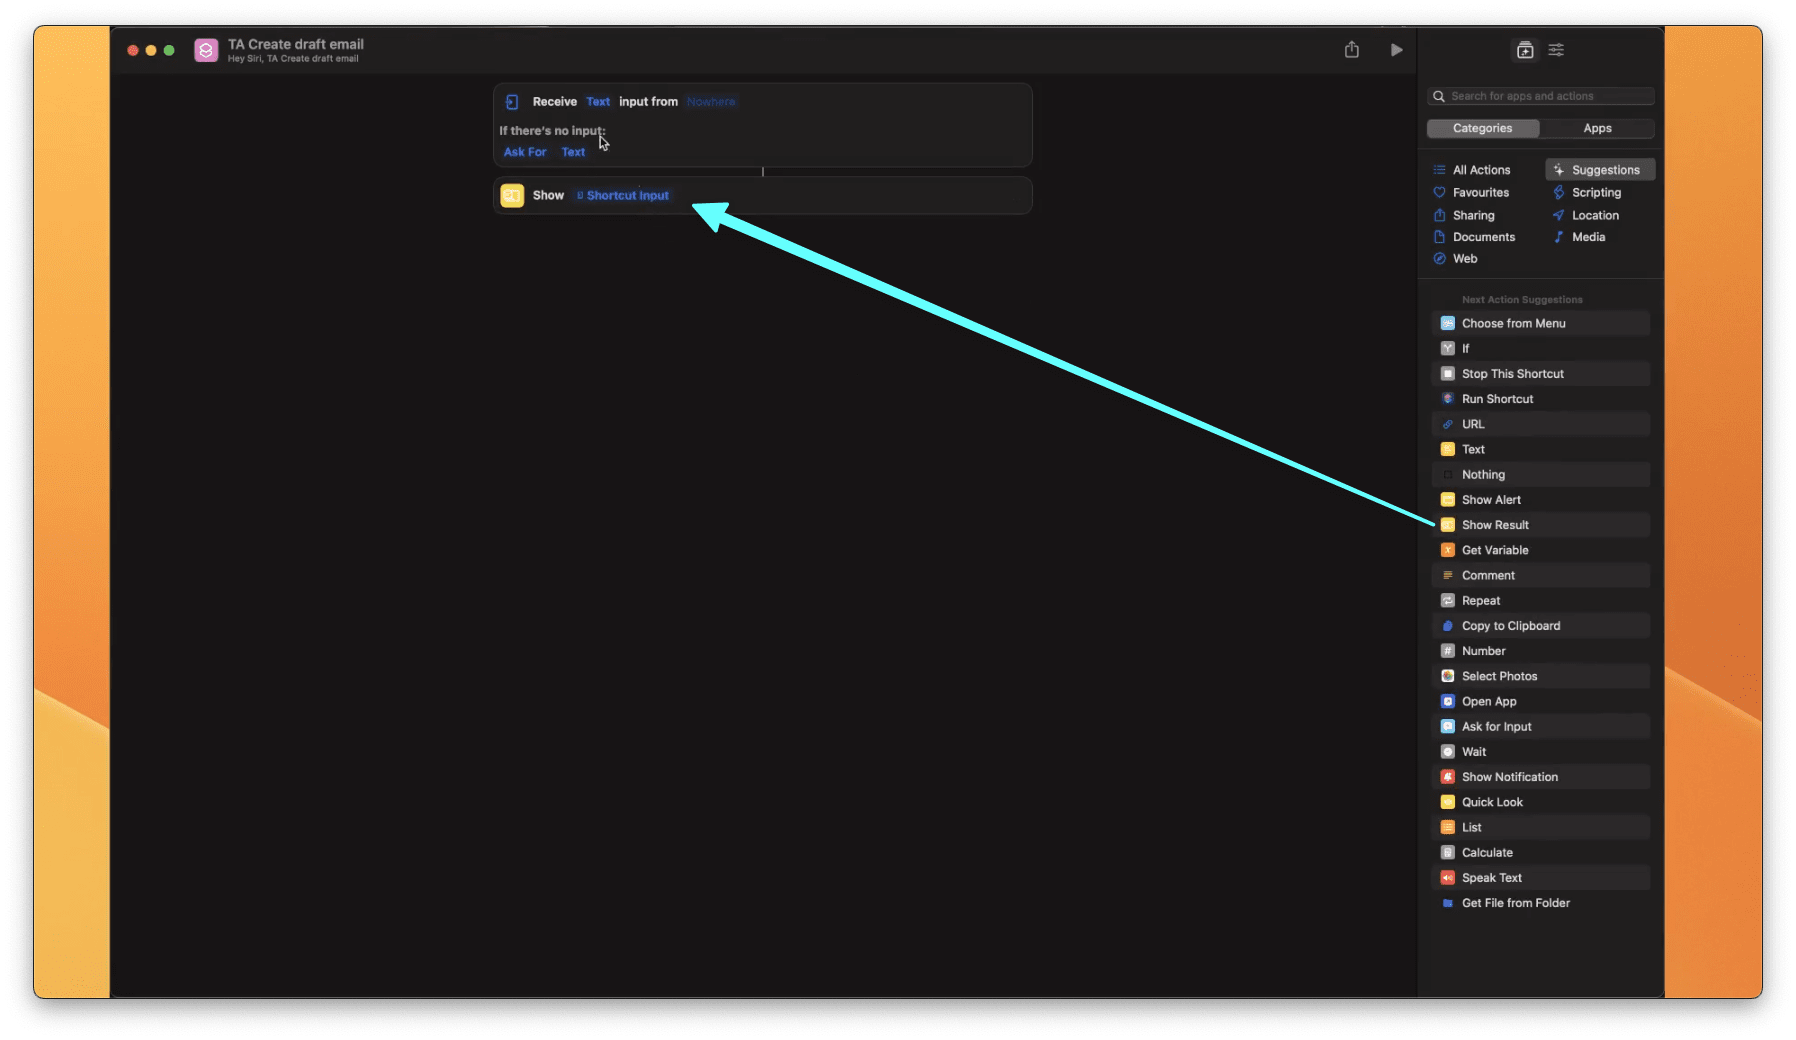
- In this case, we will add the show results node to the shortcut to test the JSON. Drag the Show Result node from the right side panel and drop it below the empty shortcut.
- Click the Release email button created in the previous tutorial in your dataview to check if the JSON runs.
Note: After every step of this draft email automation tutorial, check if it works correctly using the Show Results node. If it works, delete the Show Result node and continue to step 2.
Step 2: Create dictionary from JSON
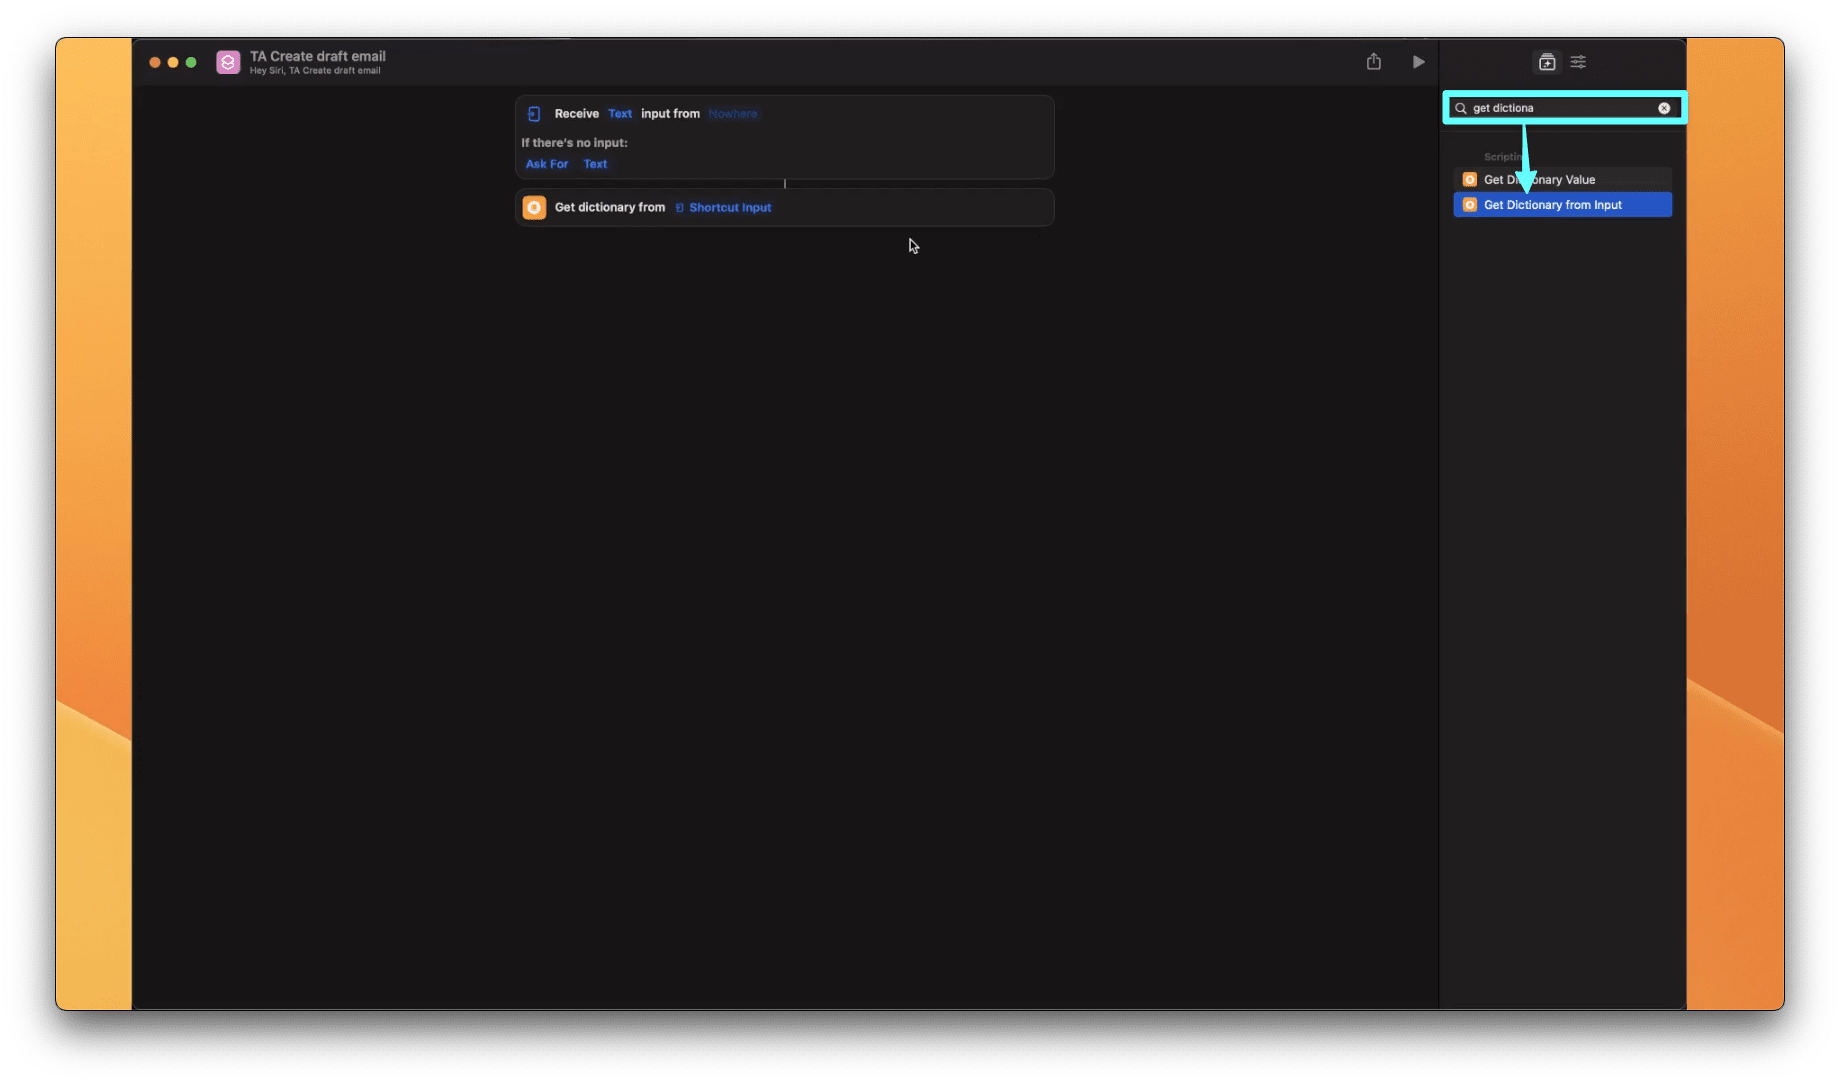
- Go to the "Input search" label in the right panel and type Get Dictionary from Input. The results will bring up the dictionary. Click Get dictionary from Input, which will be inserted below your shortcut.
The dictionary helps JSON to insert the email title, description, and tags into the draft email. Now let's add information to the dictionary.
- Search text in the "input search" label. Check the results for the Text node, drag and drop it under the dictionary.
- Click Text and type the body of your email.

If you have a description of your email body saved in your dictionary, you can insert the description at the end of the sentence.
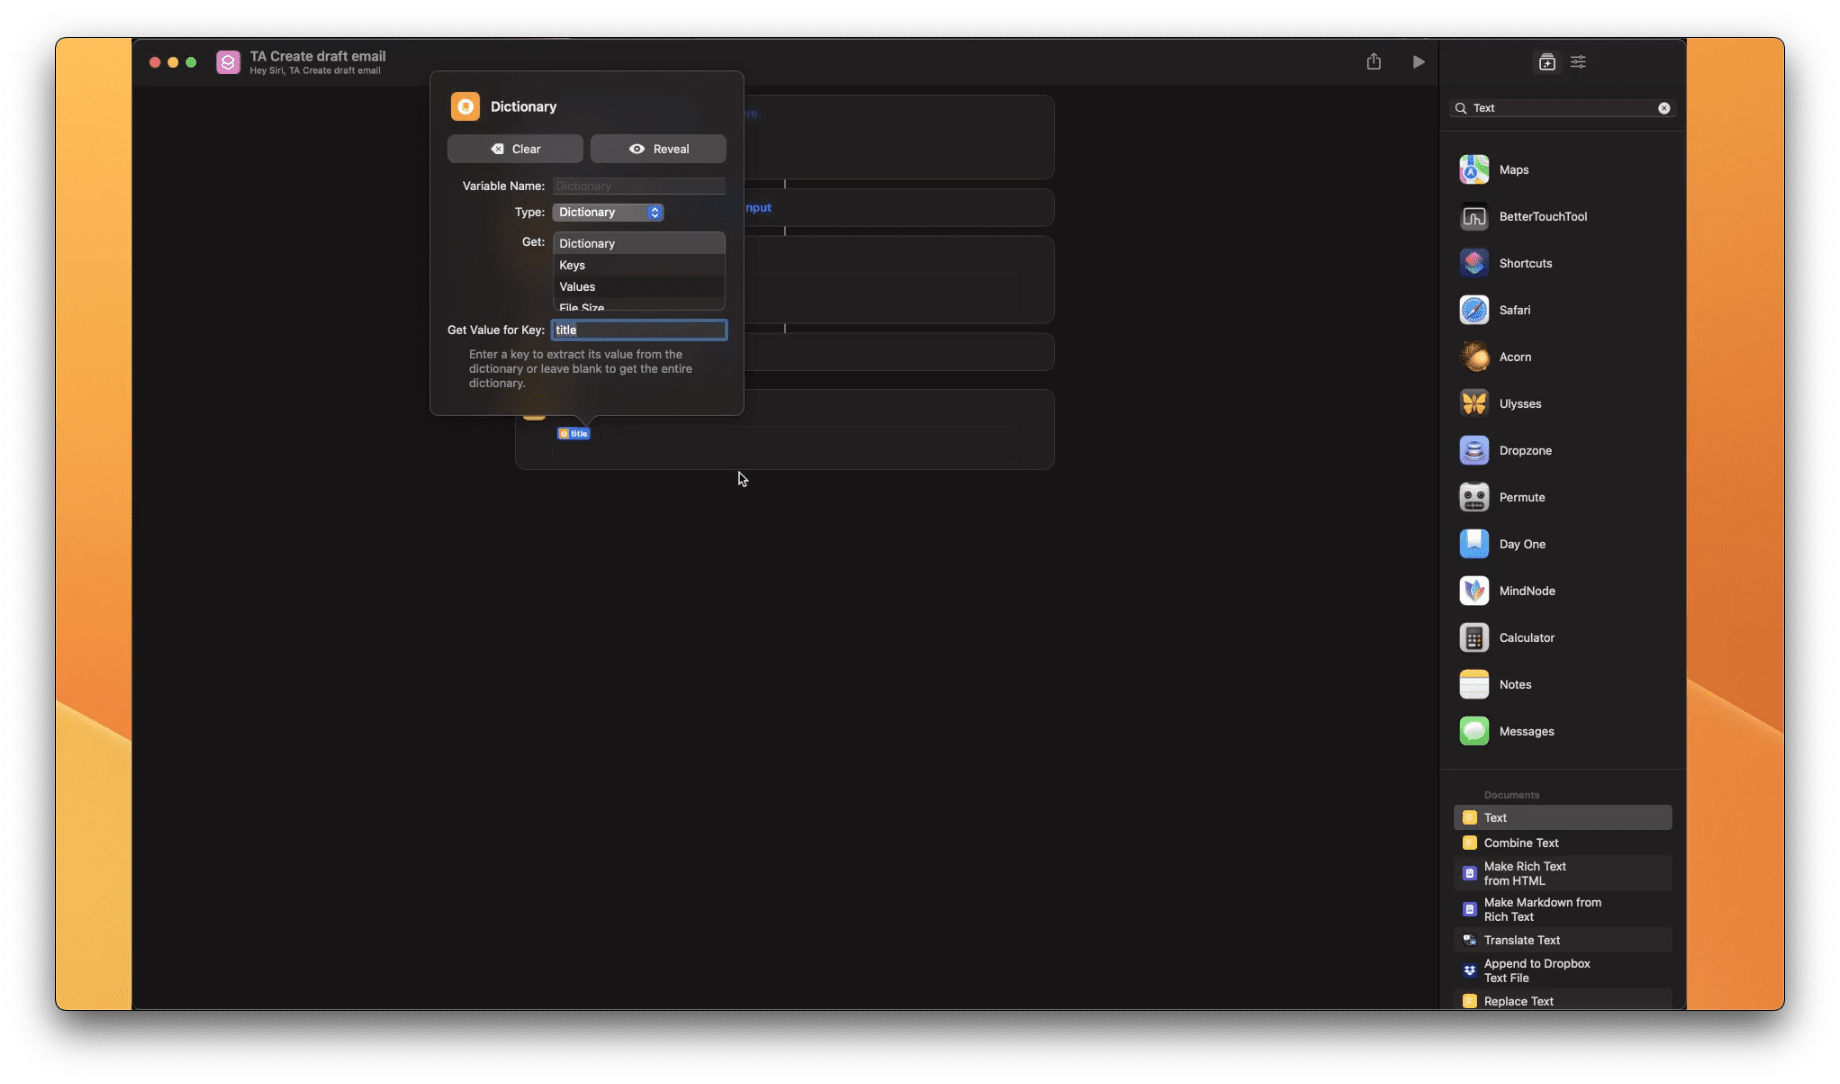
- Right-click where you want the description to appear in the Text node. Select Insert Variable and click Dictionary in the drop-down list.
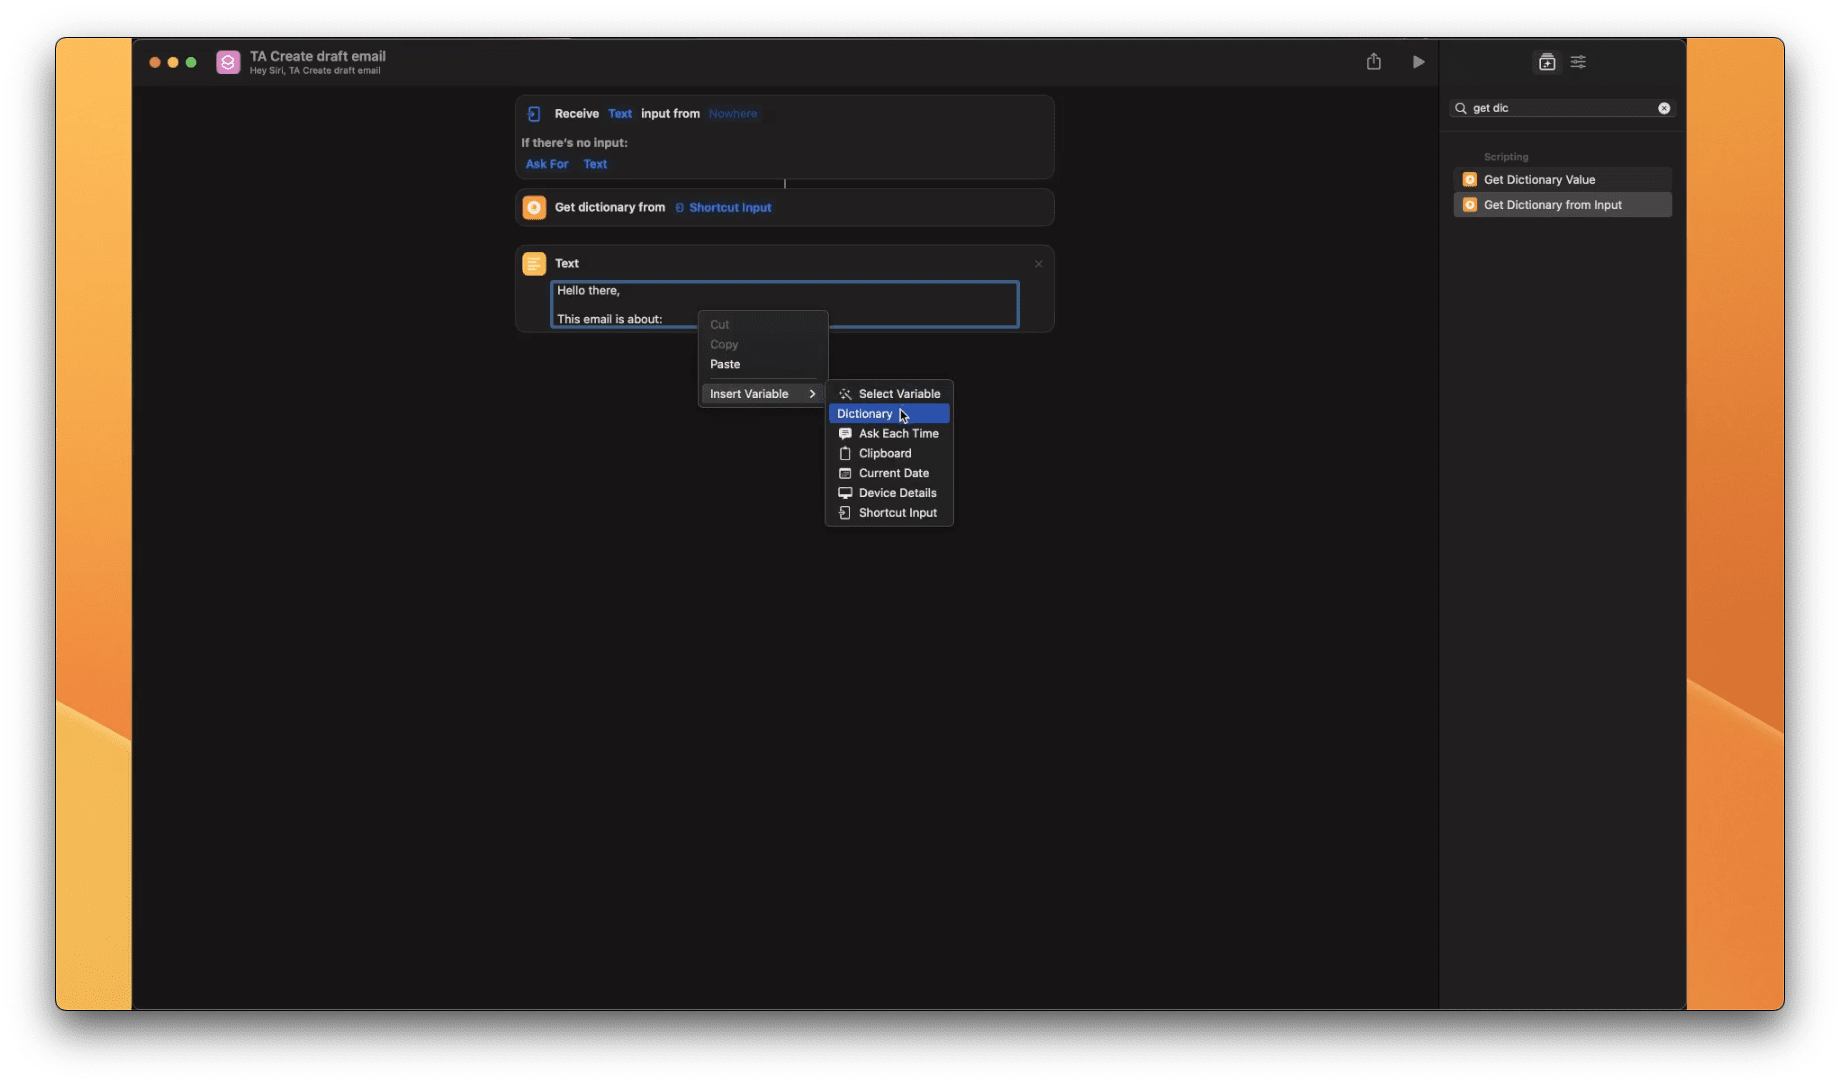
- The Dictionary properties will appear. Here you can set the information you want to be displayed - type Description in the Get Value for Key input.
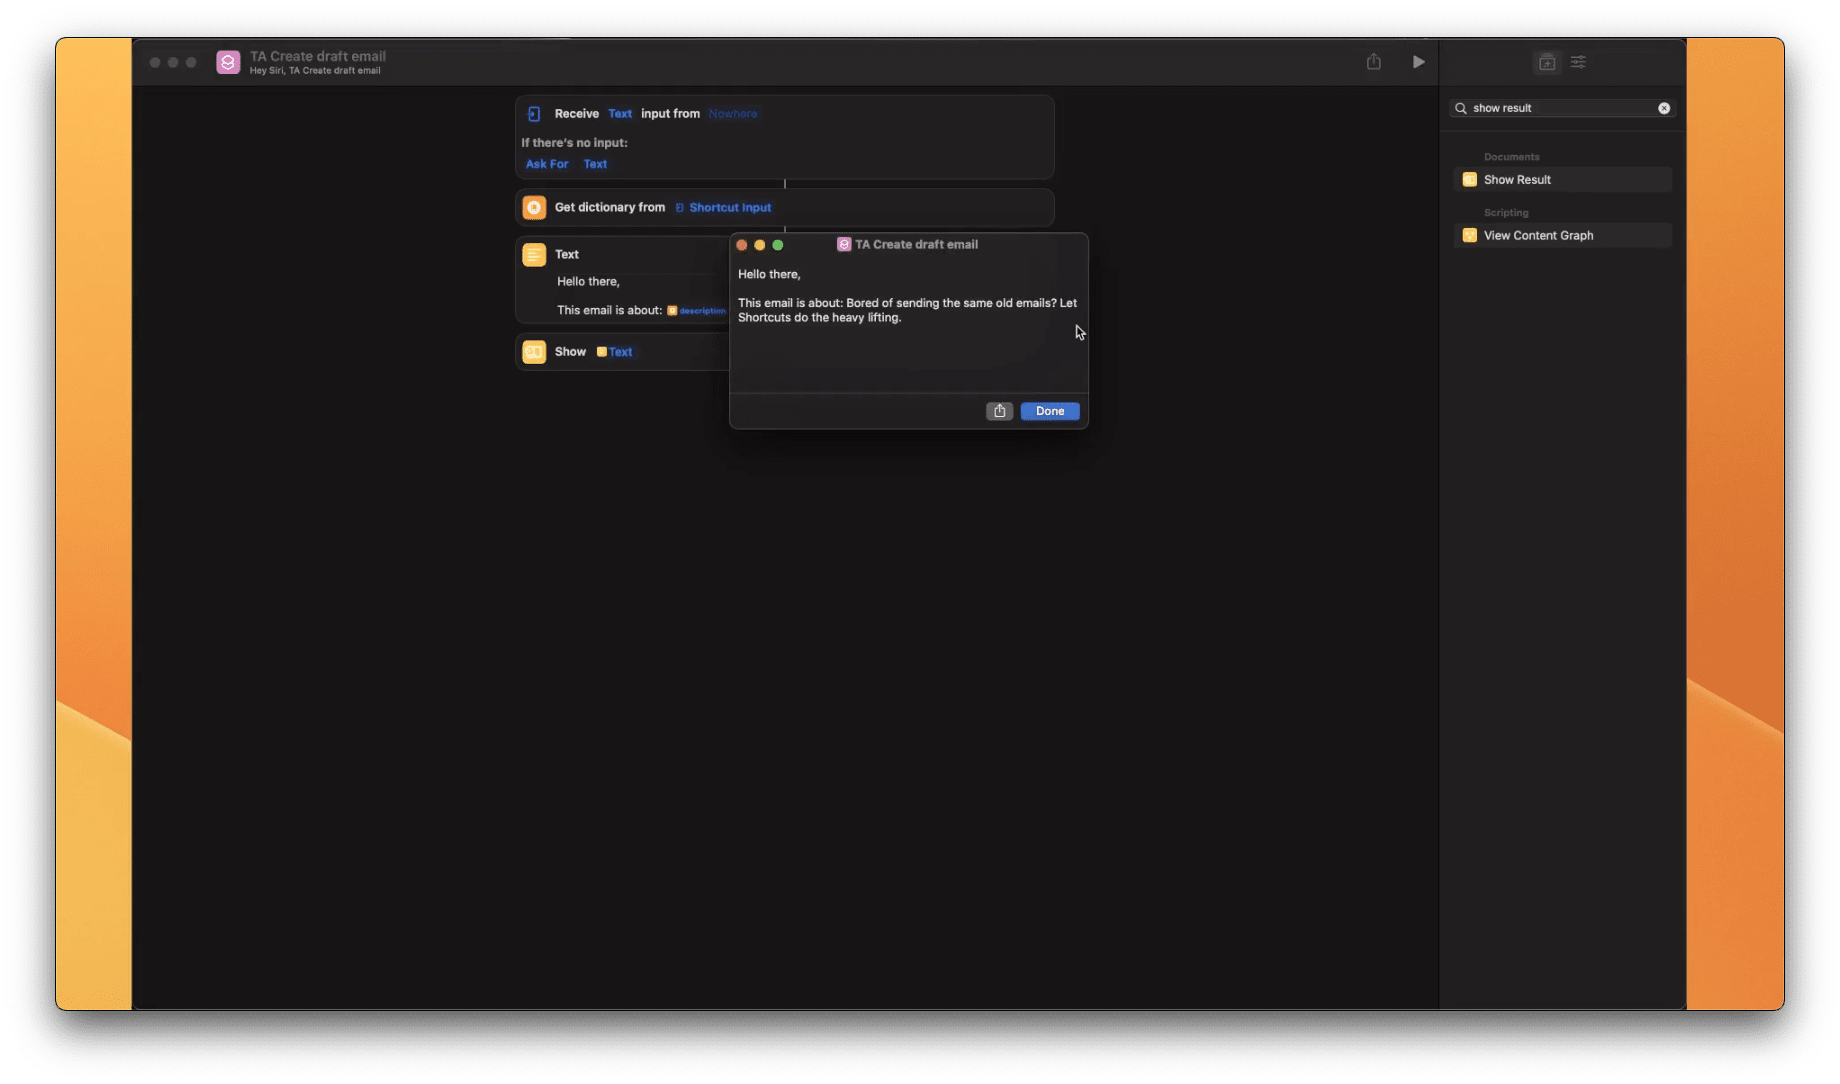
Check the JSON to ensure the automation is working correctly. As explained in Step 1 insert a Results node under the workflow created. The result should appear like in the image below:
Step 3: Create the body of the email
- Next, we set a variable to indicate the body of the email. Go to the "Input search" label on the right-side panel and type Set Variable. Click the result Set Variable to insert it into the workflow.
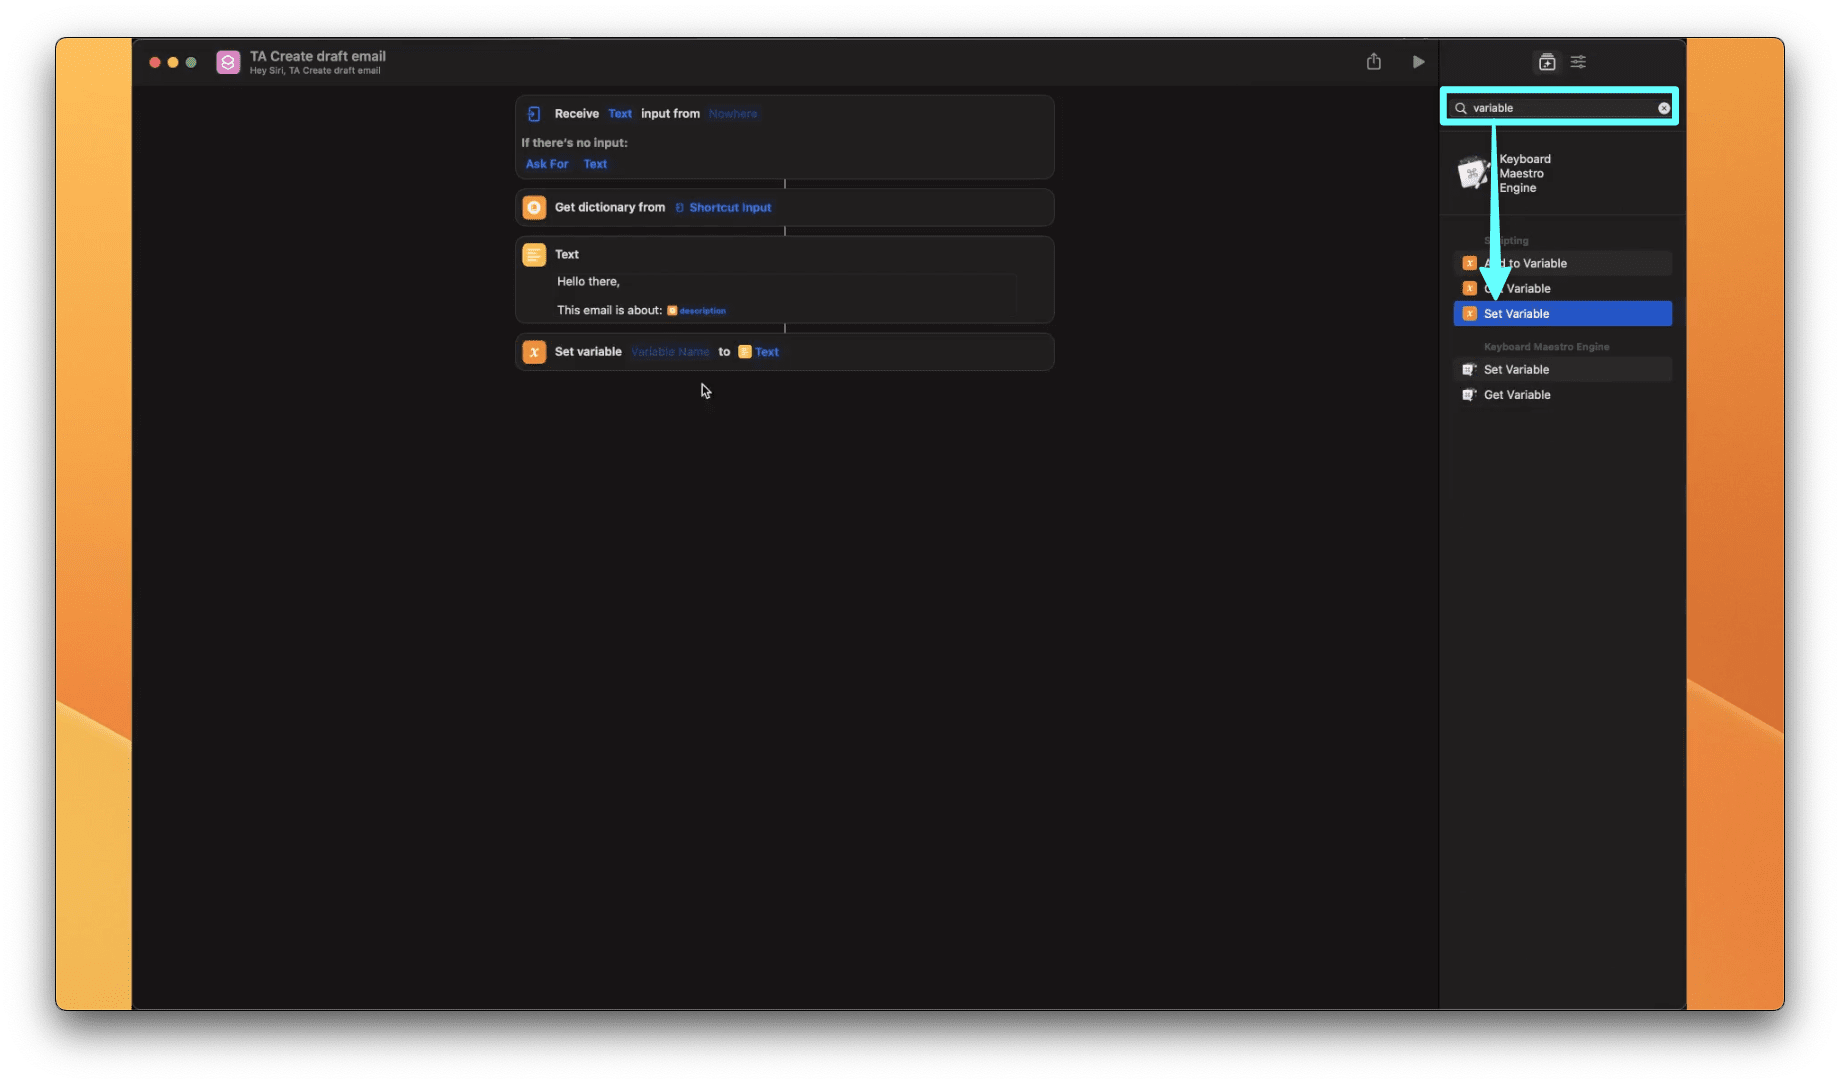
- Giving the variable a name will help you to find it easily when automating all the variables in the last step of this tutorial. Click the variable name and type "Body".
- Insert a text node to type in the details of the email body. Check Step 2 to insert the text node. Right-click in the Text node and select Insert Variable , then click Dictionary.
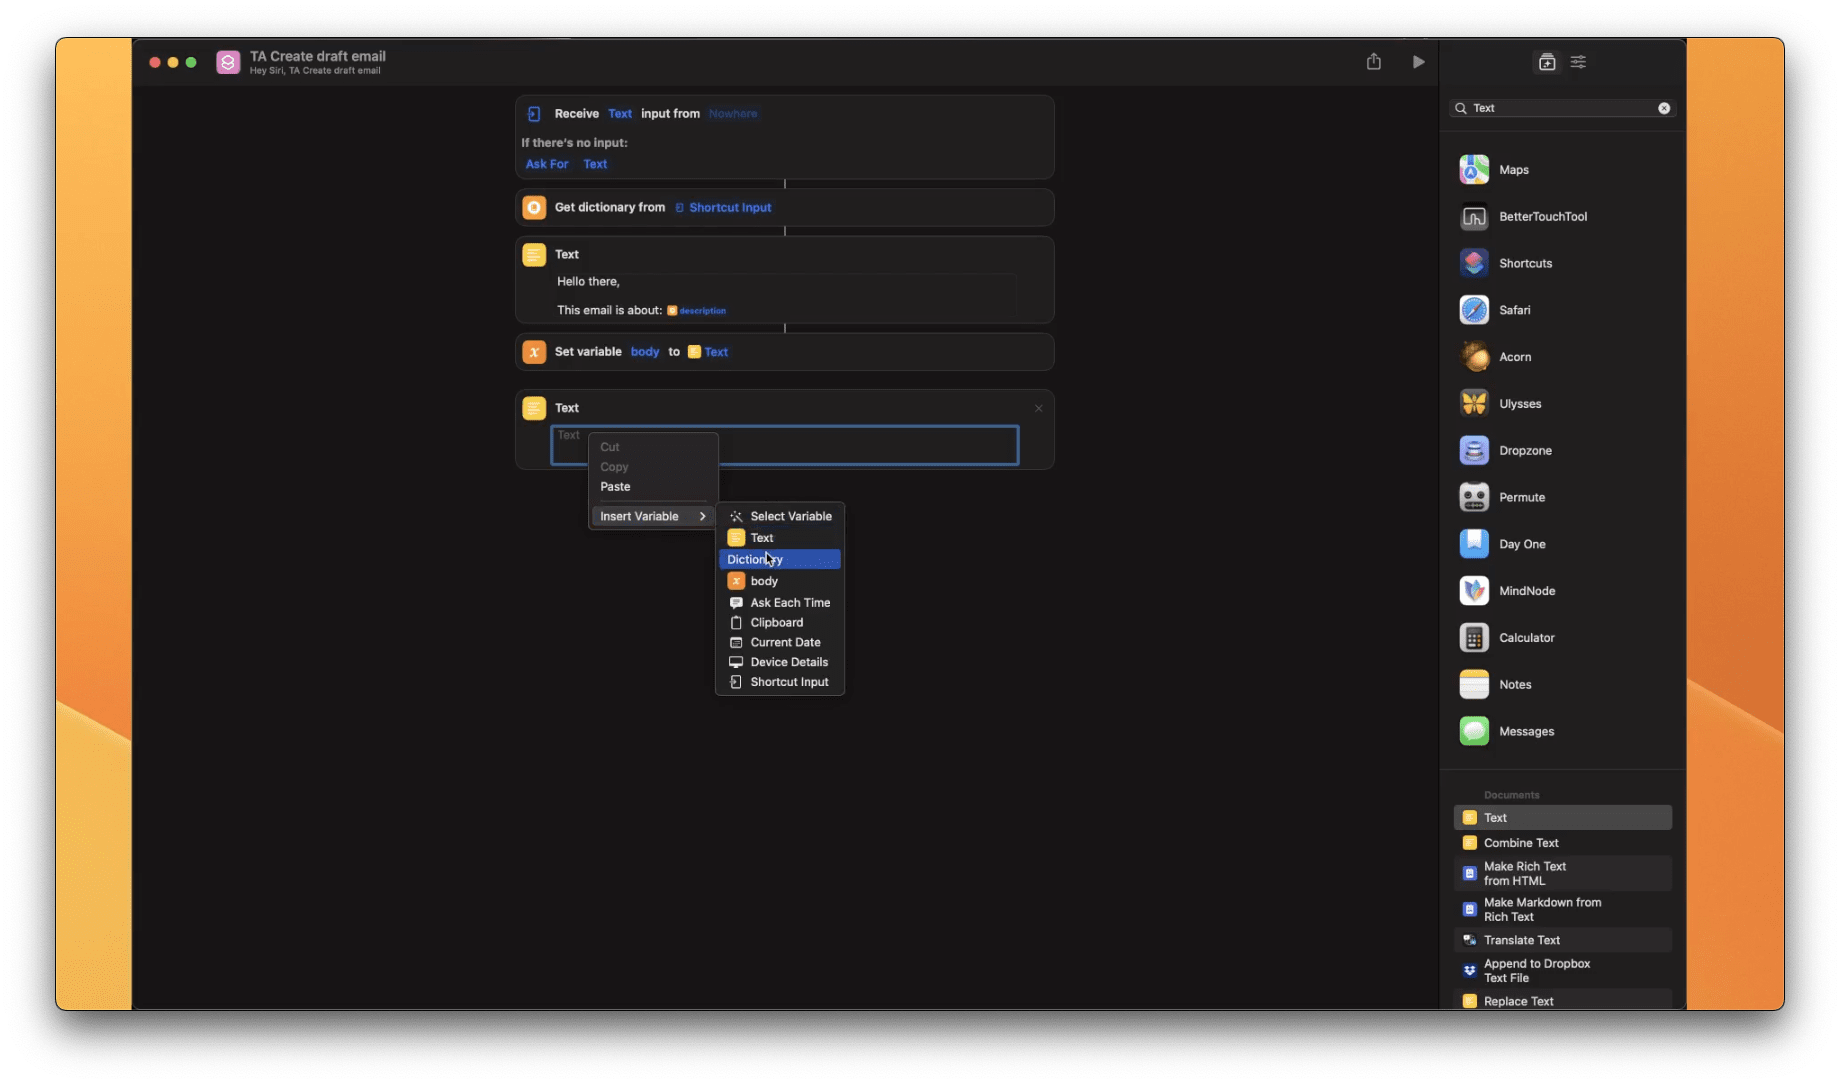
- The Text properties will appear. Go to Get Value for Key and type "Title". Press return when done.
Note: Use the Show Results node to check JSON, as seen in Step 1. If it brings up the body description, continue to the next step.
Step 4: Create the subject variable
We have to set the body into a variable. Go to the Input search label and search for Variable. Select Set Variable from the results. Name the variable as "Subject".

Step 5: Automate email creation
- For the final step, search Mail in the Input search label. Click Send Mail from the results.
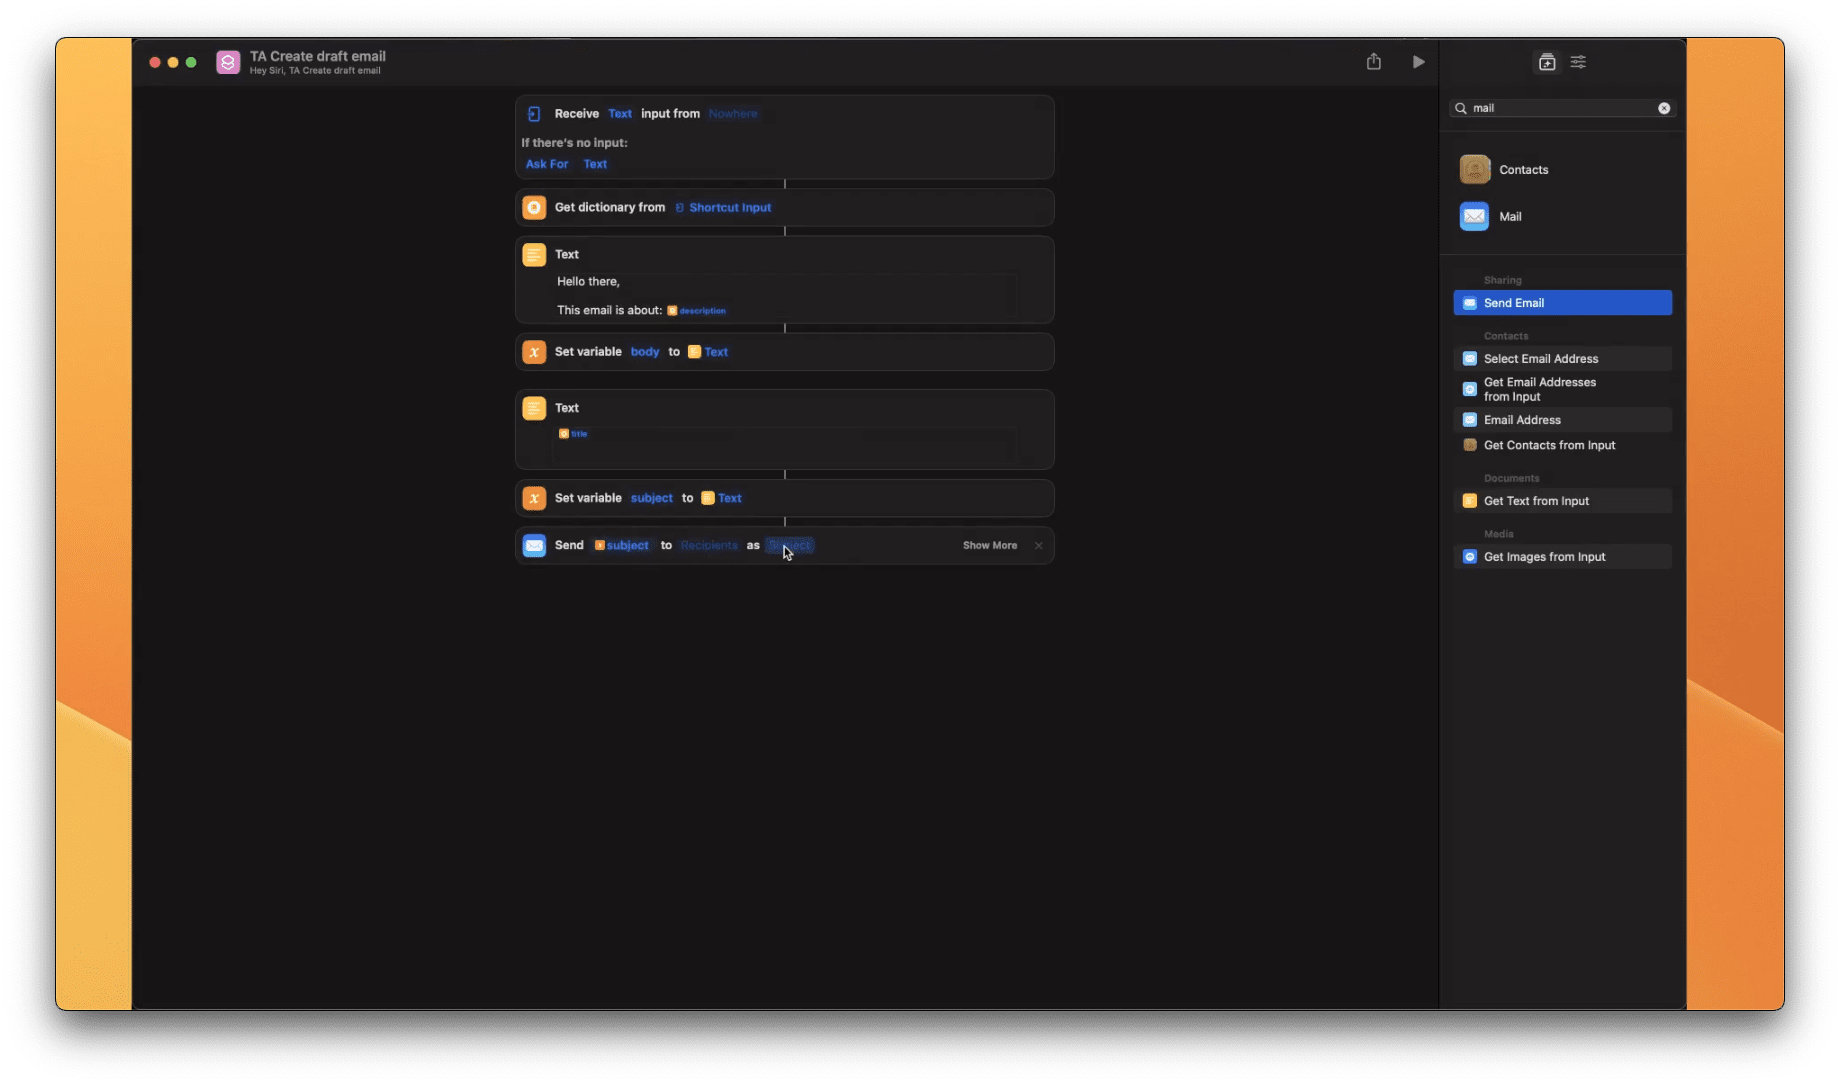
- The send mail node will appear under the workflow. Let's set the first and last input box in the node as Body and Title respectively. Right-click the first textbox and select Insert Variable and then click Body.
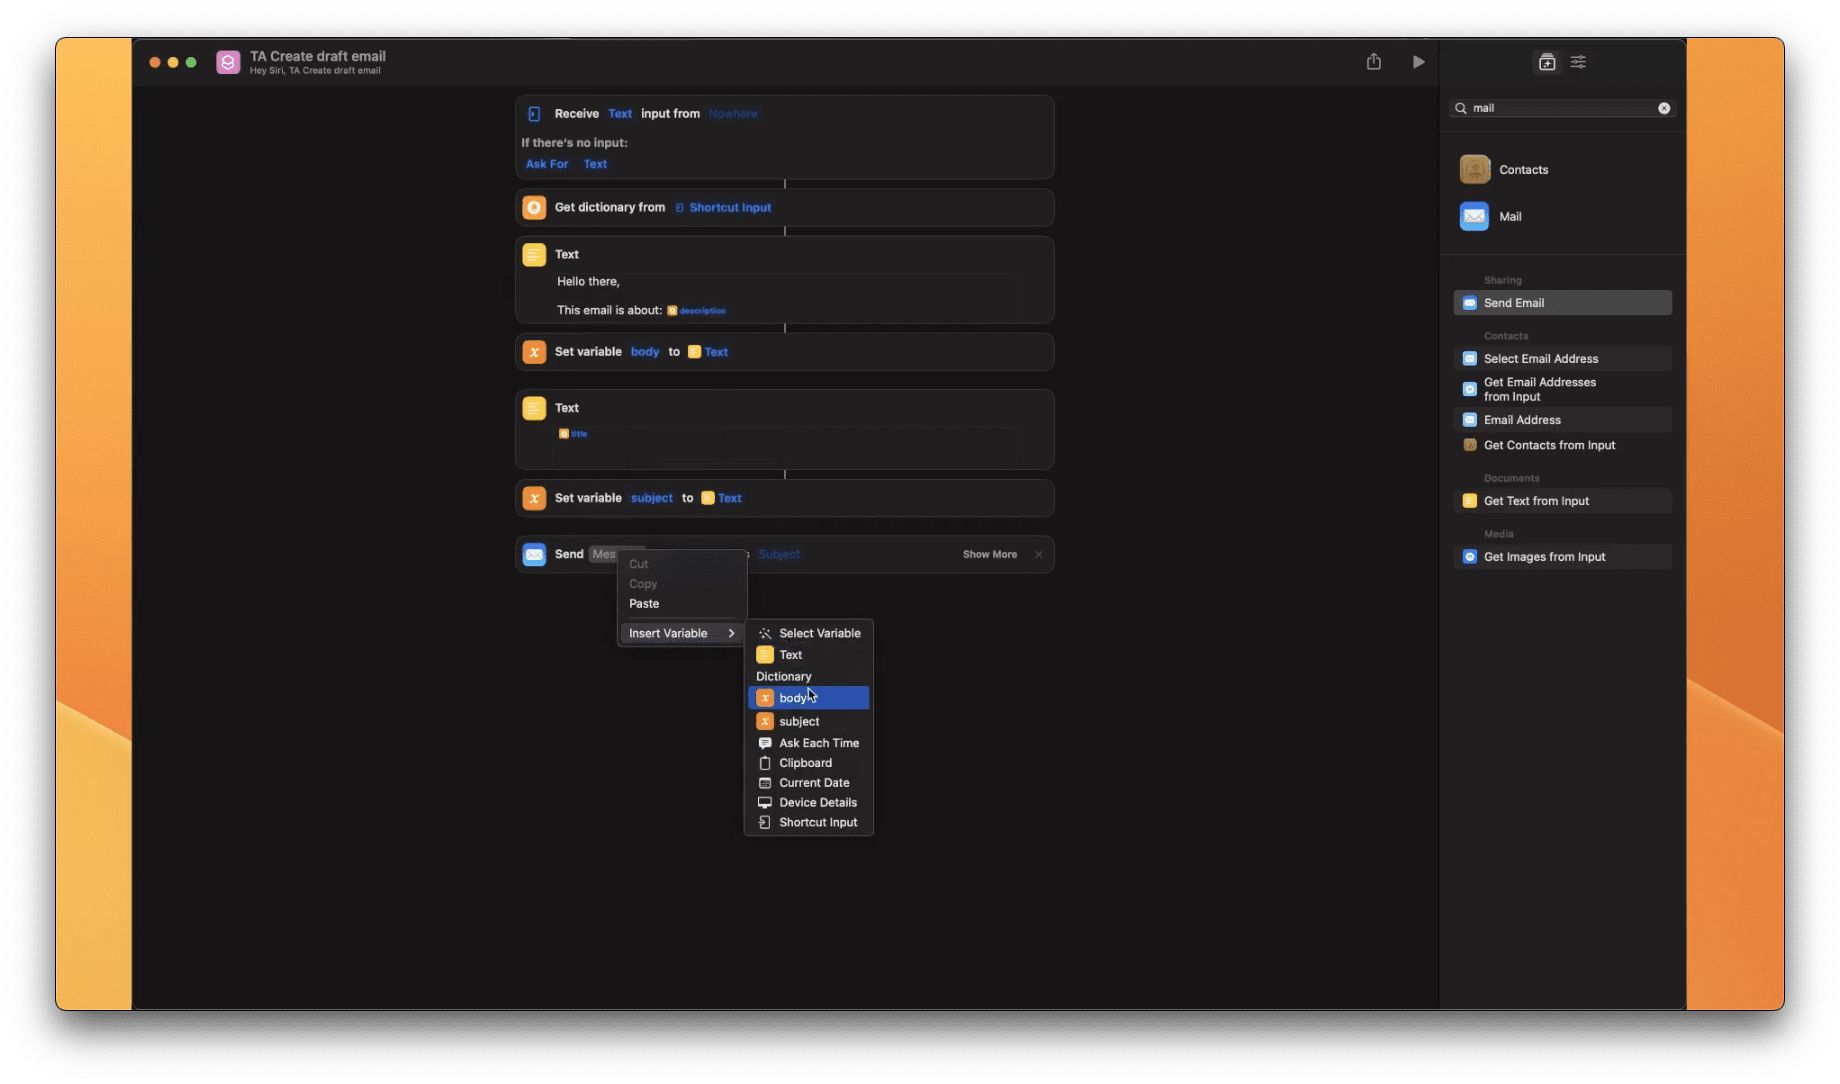
- For the last input box in the Send email node, right-click the input and select Insert Variable and then click Subject.
Note: Since it is a draft email, the Recipients input in the middle of the Send email node should remain empty.
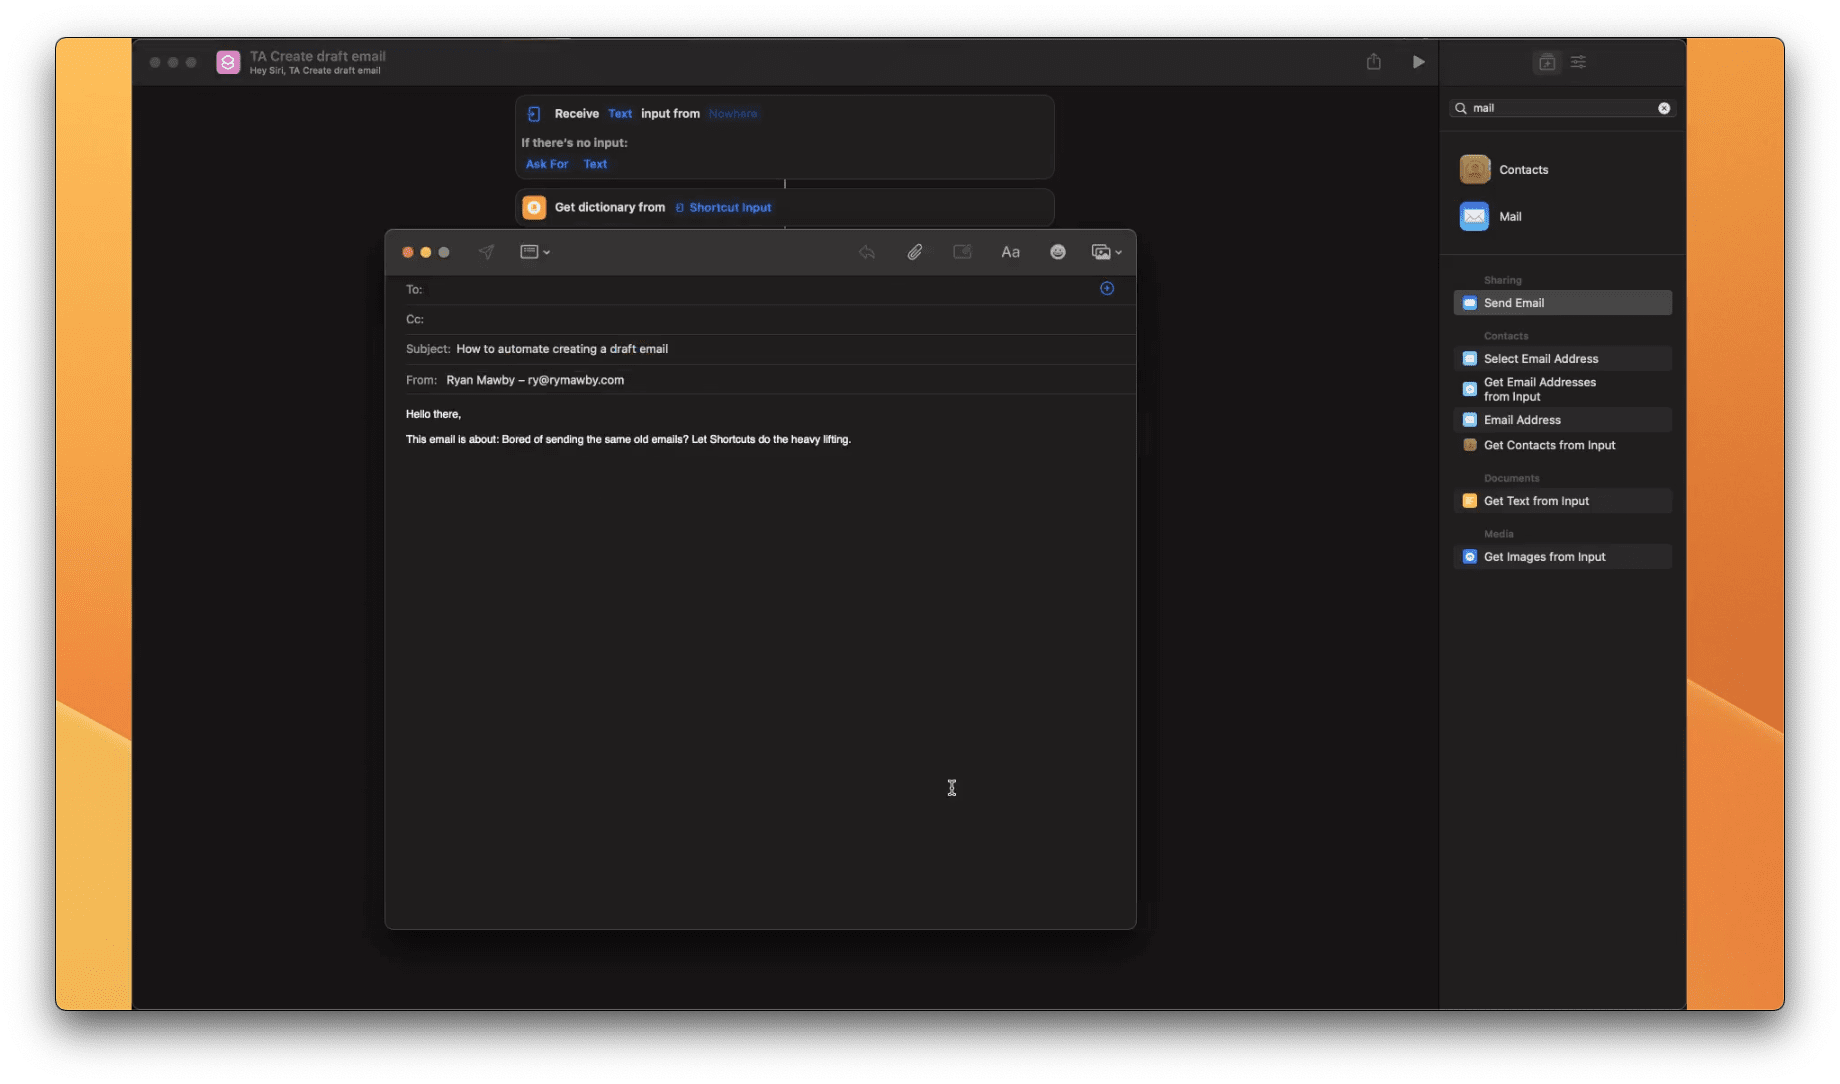
- Finally, the draft email automation is completed. To preview the results, go to the Obsidian dashboard and click the Release email button created in the previous tutorial. The final automated draft email should appear as below.