How to extract data from PDF email attachments into excel
Automation overview
Nowadays you can be inundated with PDF reports and analysis from various sources and after a quick glance they are never viewed again. Here I show you a way of extracting and saving that data from a PDF you receive in an email into Excel.
Automation flow for extracting data from PDFs using Make and inputting into Excel
How to recreate this automation
Resources
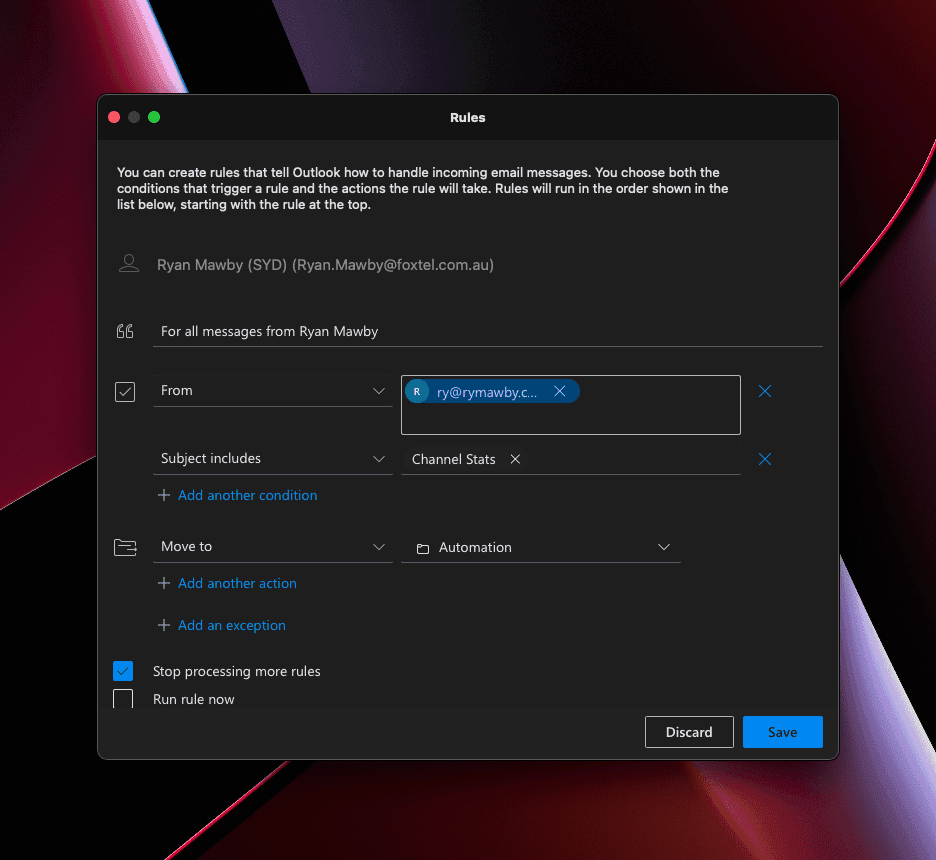
Step 1: Setup an Outlook rule to move required emails to a folder
Setting this up simplifies the process within Make - as it means we won't need to do any tricky searches on our whole inbox. For this demo I created a folder called Automation and moved any messages from my personal email address containing the subject Channel Stats into it.
Step 2: Create a Make scenario that extracts email attachments
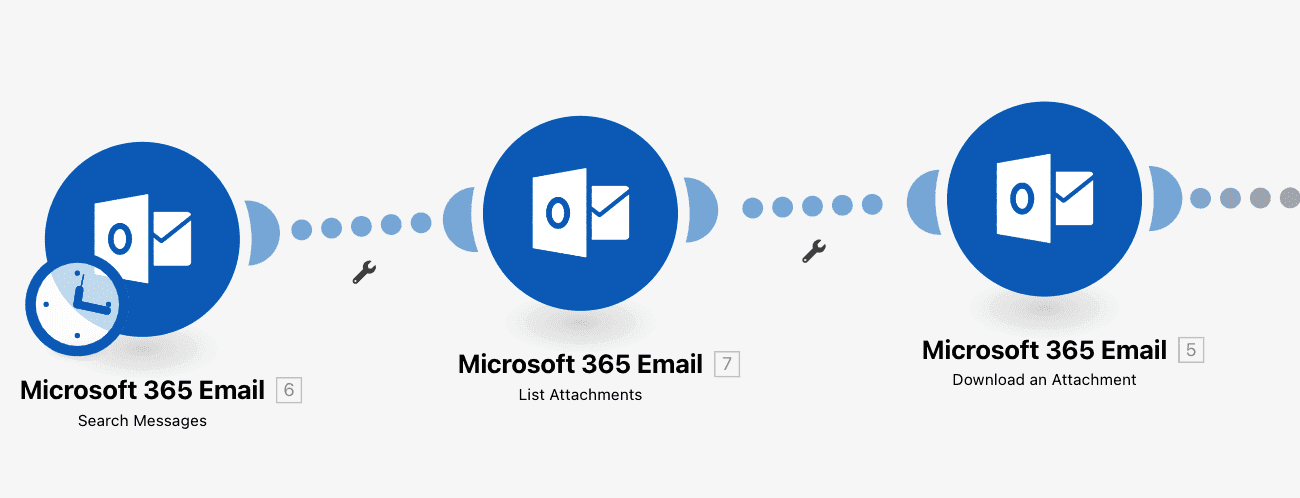
This is a 3 step process in itself - first of all you find the emails via a search, then you list out the attachments from that email and then finally you download the attachment.
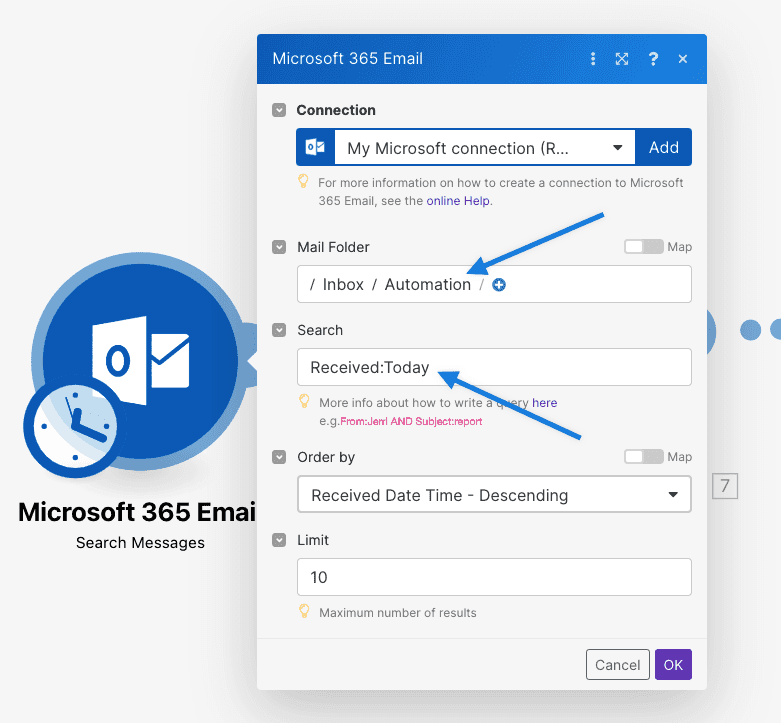
In the Search Messages node we want to grab emails from Today that are in the Automation folder we set up in Step 1.
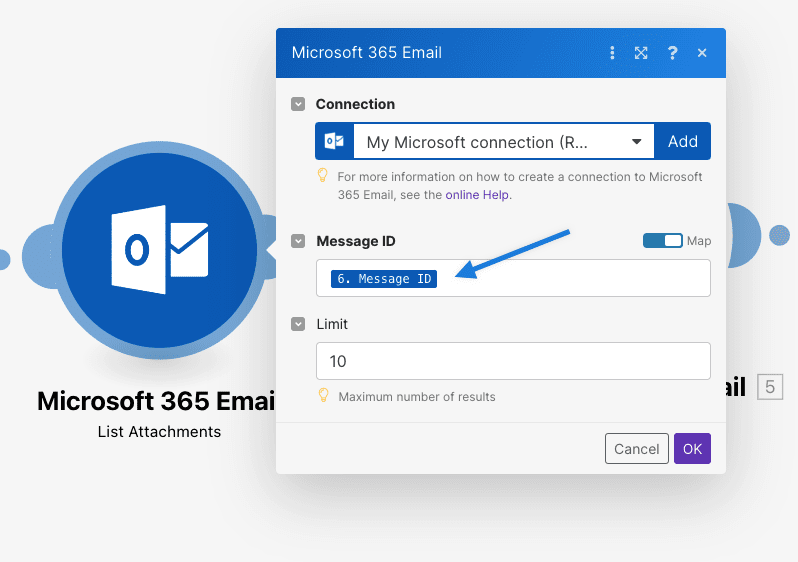
In the List Attachments node we want to use the Message ID from the search result in the Search Messages node.
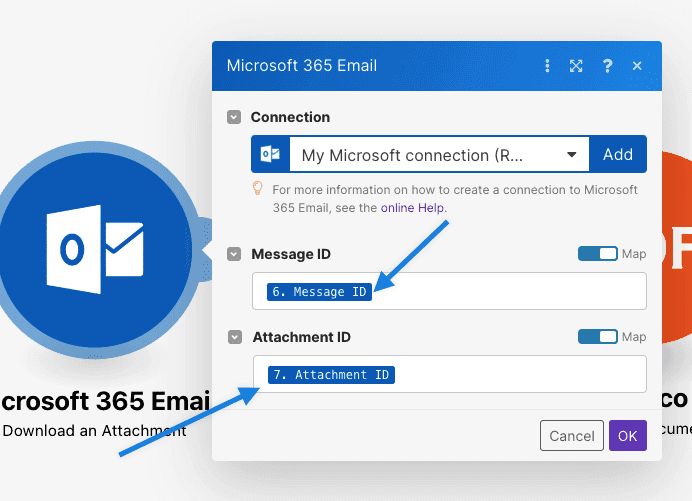
In the Download an Attachment node we want to use the Message ID from the search result in the Search Messages node and the Attachment ID from the List Attachments node.
Step 3: Extract data using PDF.co
You need to create an account on PDF.co and create a document parser. In this document parser you are able to set up objects that will extract text/data from your PDF. Here you can see how it was set it up for the demo (for more detailed information on how to set this up watch the video above).
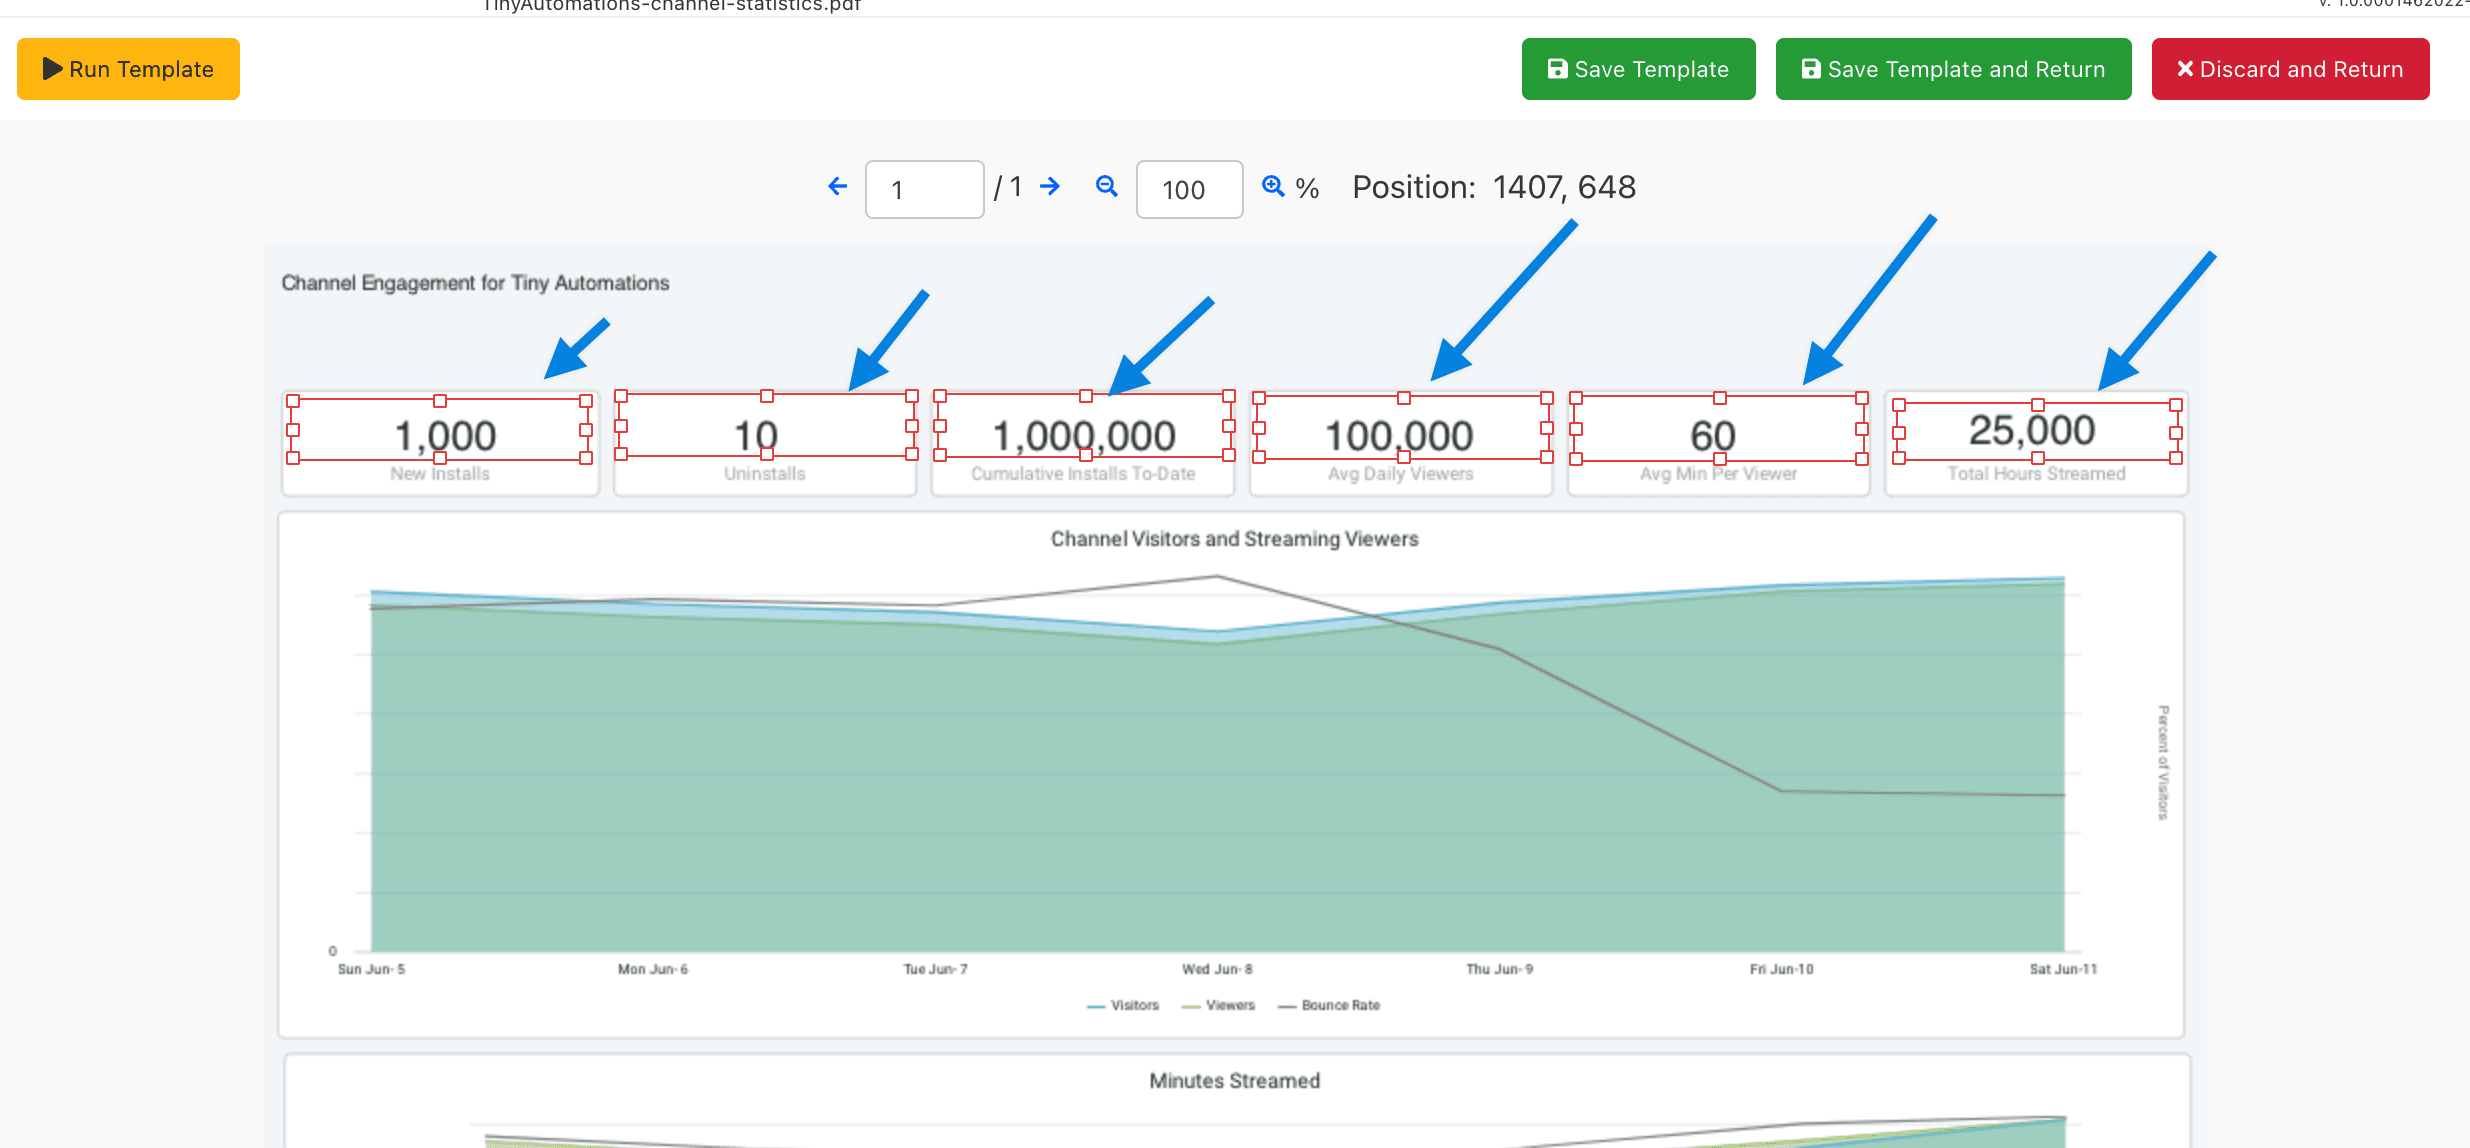
After you save take note of the ID of the Document Parser Template.

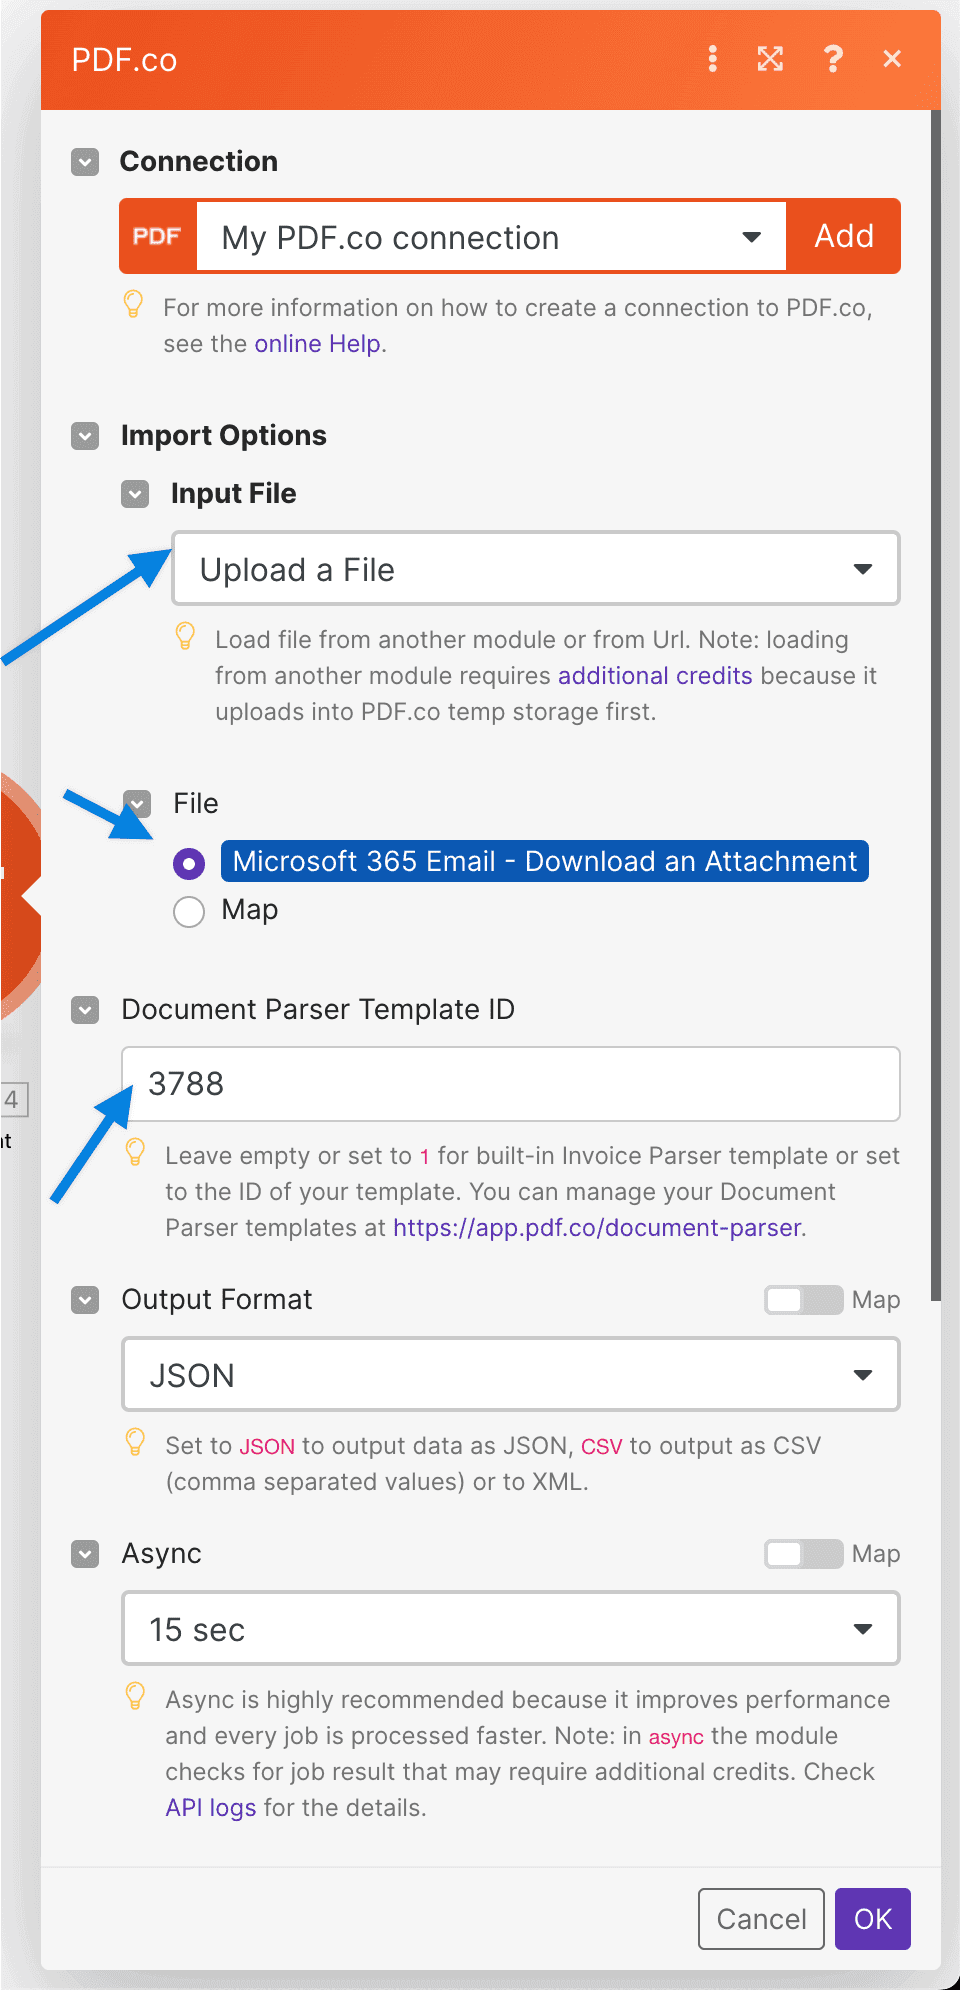
Add your PDF.co node in Make after the Download an Attachment node.
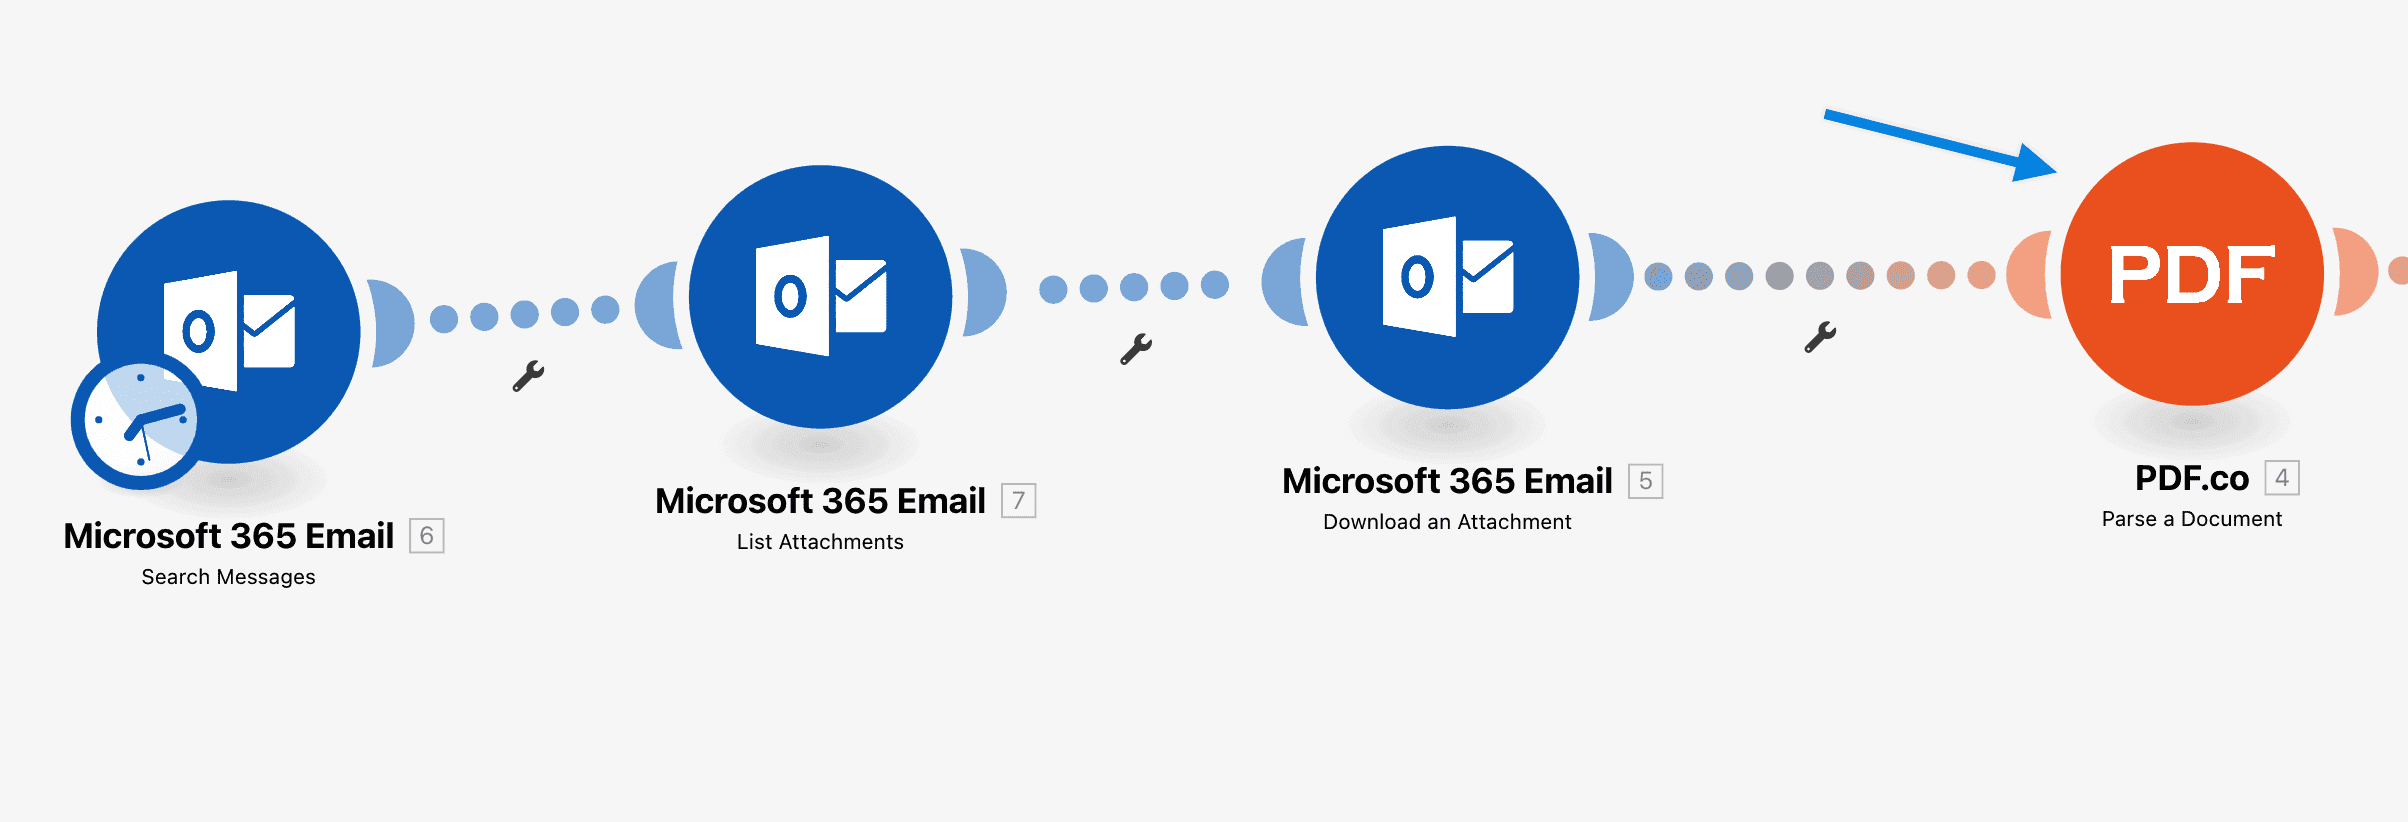
Set your PDF.co node up so that its Input File is Upload a File and the File is from the previous node. Then add the ID of your Document Parser Template that you set up earlier.
Step 4: Write out the data to Excel
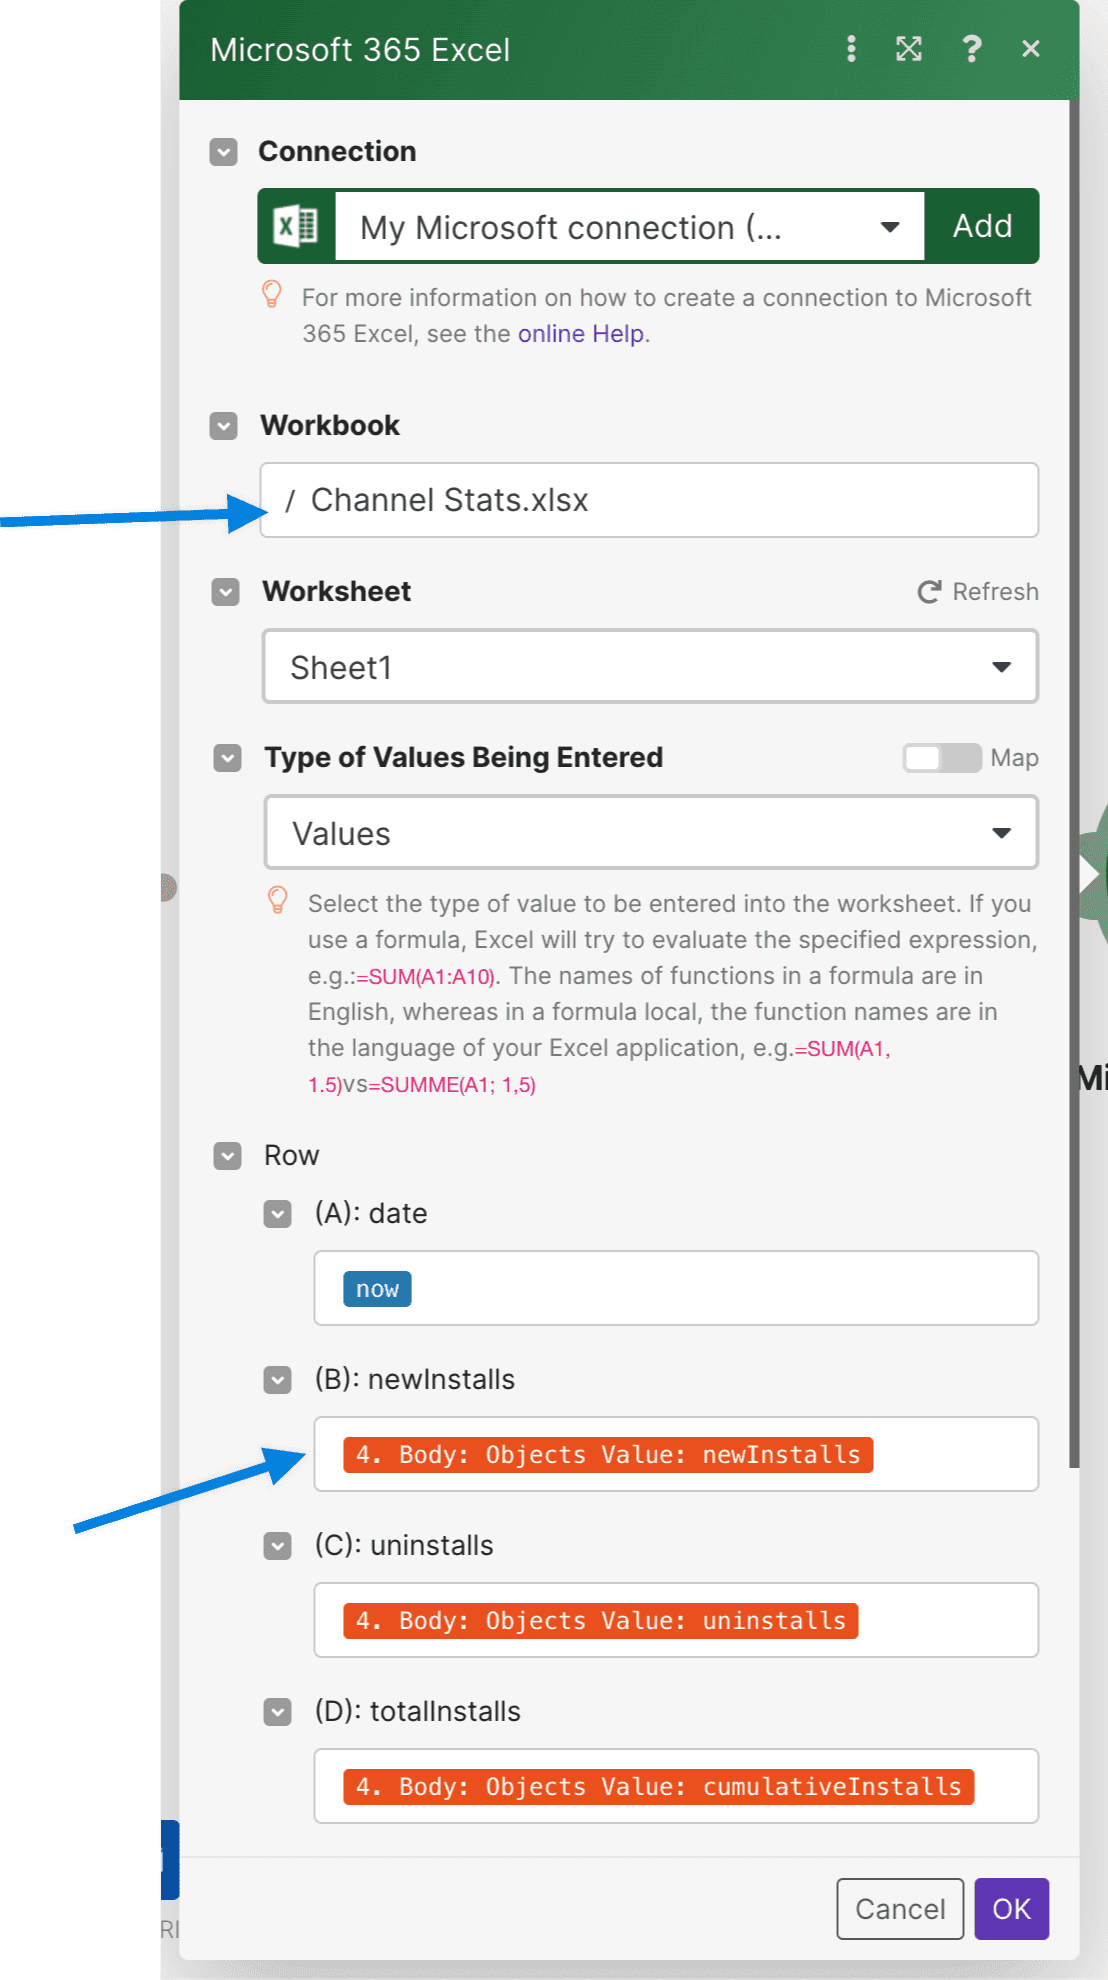
The final step is to write the data you have extracted from your PDF to your Excel spreadsheet. Add Microsoft 365 Excel Add a Worksheet Row node as the final node.

Setup your node so that it uses the values from PDF.co to write to your spreadsheet (you need to have created your spreadsheet already). The values you set up in your Document Parser Template will be available in this node to write to your spreadsheet.
Select your Workbook and then your Worksheet and the rows you have setup in your spreadsheet will become available.
